Mini Crochet Christmas Stockings Patterns: A Cozy Little Holiday Project
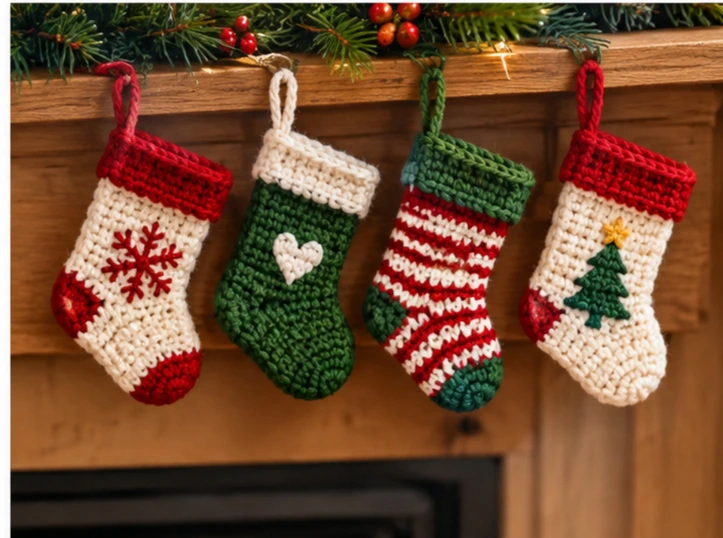
If you love the idea of Christmas decor that comes together fast and still feels handmade and special, mini crochet christmas stockings patterns are one of the best projects to add to your holiday to-do list. These tiny stockings are quick enough to finish in an evening, versatile enough to use for ornaments or gift toppers, and forgiving enough for beginners who want a real, functional finished piece rather than just a swatch.
Whether you’re hanging a full set along the mantel, tucking them onto a Christmas tree, or turning them into gift tags for stocking stuffers, a small crocheted stocking captures that classic holiday shape in a fraction of the time a full-size version takes.
What Makes This Crochet Project Special
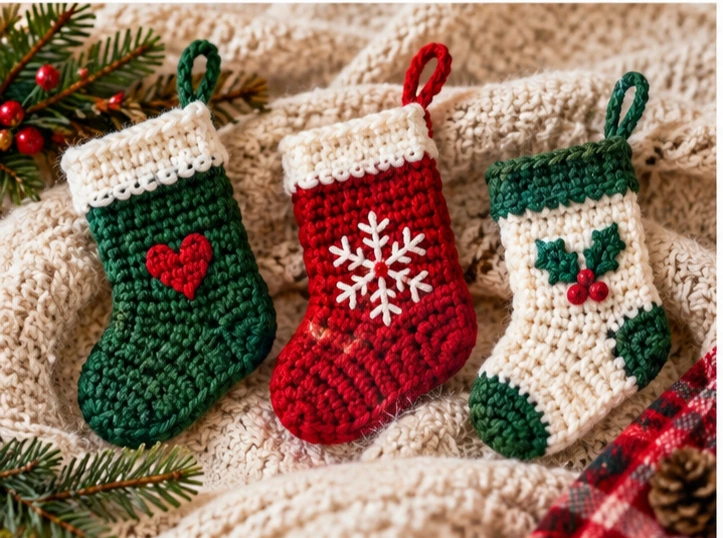
Mini stockings work because they take a familiar, beloved shape and shrink it down into something playful and giftable. The classic stocking silhouette — a rounded heel, a straight leg, and a folded-over cuff — is instantly recognizable, which means even a simplified version reads clearly as “Christmas stocking” the moment someone sees it.
Because the finished piece is small, mini stockings are also an excellent way to practice core amigurumi and flat-crochet skills without committing to a large project. You get to work with color changes, simple shaping, and finishing techniques like seaming or adding a hanging loop, all on a project that crochets up quickly. That makes this pattern style popular with beginners who want a confidence-building win, as well as with experienced crocheters who need a fast, repeatable pattern to make in batches for gifts, craft fairs, or tree ornaments.
The scale also makes color and texture choices more forgiving. A slightly uneven row that might stand out on a full-size stocking tends to disappear into the charm of a smaller piece.
Materials You May Need
Exact yarn weight, hook size, and finished dimensions can vary quite a bit depending on which specific mini stocking pattern you’re following, so treat this as a general starting list rather than fixed specifications:
- Yarn: A worsted weight (medium, category 4) cotton or acrylic yarn is common for mini stockings because it holds its shape well, but many crocheters also use DK or sport weight yarn for an even smaller, more delicate result. Traditional holiday colors like red, green, and white are popular, though neutral or metallic-accent yarns are increasingly used for a more modern look.
- Crochet hook: Choose a hook sized to match your yarn weight for firm, even stitches. A slightly smaller hook than the yarn label suggests can help keep amigurumi-style pieces tighter and less see-through.
- Stuffing (if applicable): Polyester fiberfill, only needed if your stocking has any dimensional or amigurumi-style shaping rather than being fully flat.
- Yarn needle: For weaving in ends and any seaming.
- Scissors
- Stitch marker: Helpful for tracking rounds if the stocking is worked in the round rather than flat rows.
- Ribbon or contrasting yarn: For a hanging loop, if you plan to use the stocking as an ornament.
- Optional embellishments: Small buttons, pom-poms, faux fur trim, or embroidery floss for cuff detailing.
If you’re shopping for supplies, both craft chains and big-box retailers regularly stock seasonal yarn and small amounts of holiday-themed trim in the months leading up to Christmas, and it’s worth checking clearance sections after the holidays for discounted supplies to use the following year.
How to Make It
Mini stockings are generally built in one of two ways: as a flat, two-piece design (crochet two matching stocking shapes and seam them together) or as a single piece worked in the round with light shaping for the heel and toe. Below is a general framework for the flat method, which tends to be the more beginner-friendly approach.
Step 1: Chain and Start the Cuff
Start with a foundation chain sized for the width of your mini stocking’s cuff, then work your first row in single crochet or half double crochet across. This top edge will become the opening of the stocking.
Step 2: Build the Leg
Continue working rows straight up (or down, depending on your pattern’s direction) to form the leg of the stocking. Keep your stitch count consistent row to row unless your pattern calls for shaping.
Step 3: Shape the Heel and Foot
This is where the stocking silhouette comes to life. Most mini patterns use short rows or strategic increases along one edge to create the angled heel, then continue into a straighter foot section. Go slowly here and follow your specific pattern’s stitch counts closely, since this shaping step is what gives the piece its recognizable stocking shape.
Step 4: Shape the Toe
Taper the stitch count gradually at the toe end, using decreases spaced evenly across the row, until the point is rounded rather than square.
Step 5: Make a Second Matching Piece
If you’re using the two-piece flat method, repeat the same steps to create a mirror-image second piece.
Step 6: Seam the Pieces Together
With right sides facing or wrong sides together (depending on the look you want), whip stitch or slip stitch around the edges, leaving the top cuff opening free.
Step 7: Add a Hanging Loop
Chain a small loop of stitches or attach a length of ribbon to the top corner of the cuff, securing it well since this loop will bear the stocking’s weight when hung.
Step 8: Weave in Ends and Finish
Weave in all loose yarn tails neatly on the inside of the stocking, and trim any excess.
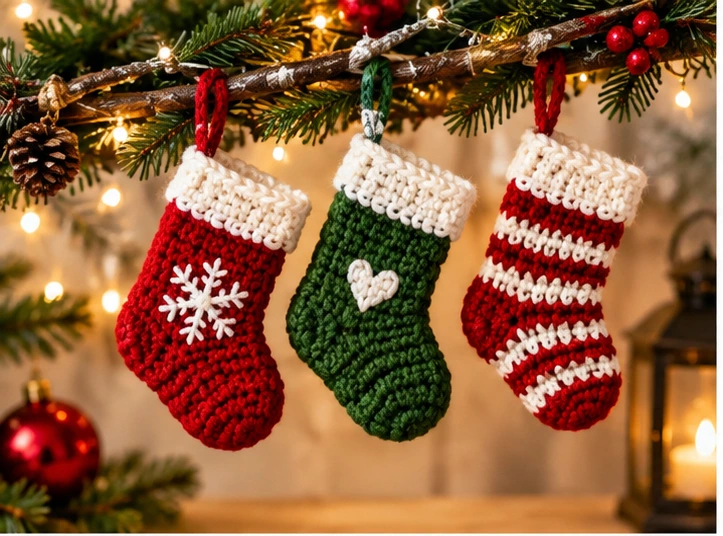
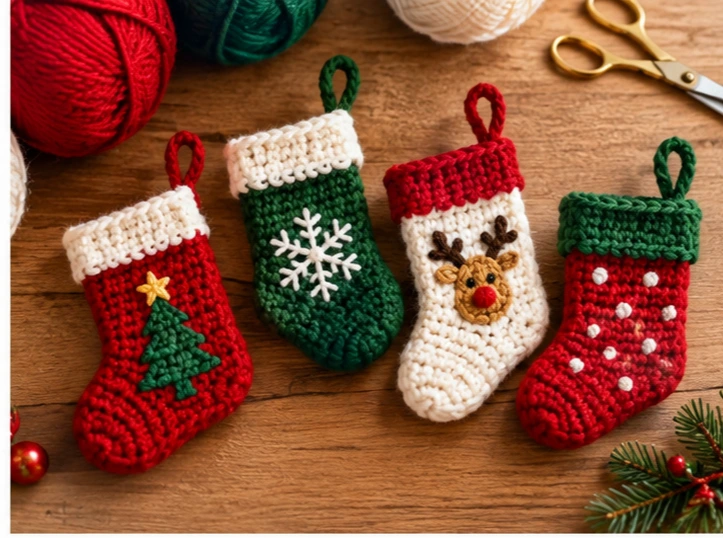
If the specific pattern you’re following includes a solid toe/heel color block, cuff trim in a contrasting color, or added surface details like a snowflake or candy cane motif, follow those instructions in addition to this general framework, since exact stitch counts will vary by designer and yarn weight.
Tips for a Better Result
- Choose yarn with good stitch definition. A smooth worsted cotton or acrylic will show your stitches clearly, which matters more on a small project where every row is visible.
- Keep your tension consistent. Small pieces make tension inconsistencies more noticeable, so try to crochet at a steady, even pace rather than rushing.
- Use stitch markers for shaped rounds. If your stocking is worked in the round, mark the beginning of each round so you don’t lose track during heel and toe shaping.
- Block flat pieces before seaming. A light steam block or damp blocking can straighten curled edges and make your two stocking pieces easier to line up evenly.
- Match your seaming yarn to your project color for an invisible finish, or use a contrasting thread intentionally as a decorative edge.
- Test your hanging loop’s strength before adding the stocking to a tree or garland — a loop that stretches or slips will let the ornament fall.
Top 4 Crochet Trends
1. Textured Stitch Play
Beyond basic single and double crochet, more crocheters are experimenting with textured stitches like the moss stitch, bobble stitch, or linen stitch to add visual interest without changing color. On a mini stocking, you could work the cuff section in a textured stitch while keeping the leg and foot in simple single crochet, giving the piece dimension without added complexity.
2. Neutral and Muted Holiday Palettes
While red and green remain classic, there’s a growing interest in softer, more neutral holiday color schemes — think cream, sage, terracotta, and warm taupe — for a look that fits modern home decor year after year. Consider crocheting a set of mini stockings in a neutral palette with just one traditional red or green accent stripe for a fresh but still festive result.
3. Amigurumi-Adjacent Ornaments
Small, dimensional crochet ornaments (rather than flat shapes) continue to be popular for handmade holiday decorating. If you want your mini stocking to have more shape and presence on the tree, lightly stuff the toe and heel area before seaming for a slightly puffed, amigurumi-inspired finish.
4. Personalized, Named Ornaments
Adding a name, initial, or small personalized detail to handmade ornaments has become a common way to make gifts feel more intentional. A tiny embroidered initial on the cuff of a mini stocking, or a small tag with a name, turns a simple project into a keepsake gift.
Styling and Gift Ideas
- Crochet a full set in coordinating colors to hang along a mantel, staircase railing, or garland for a cohesive handmade look.
- Turn a single mini stocking into a gift card holder by slipping a card or small folded note inside before gifting.
- Attach several mini stockings to a length of twine or ribbon garland for a quick, budget-friendly holiday decoration.
- Use them as place-card holders at a holiday dinner table, tucking a name card into each stocking opening.
- Fill them with tiny treats, candy, or trinkets as stocking stuffers within a larger gift.
- Sew a small loop onto the back and clip it to a stocking as a whimsical stocking-on-a-stocking accent.
FAQs
Is a mini crochet Christmas stocking pattern good for beginners? Yes. Because the finished piece is small, it’s a manageable project for practicing basic shaping, color changes, and simple seaming without the time investment of a full-size item.
What size are mini crochet stockings usually? Sizes vary by pattern and yarn weight, but most mini stockings fall somewhere in the ornament-sized range, roughly a few inches tall. Always check the finished measurements listed in your specific pattern, since hook size and yarn weight will change the outcome.
What’s the best yarn for crocheting a mini stocking? A worsted weight cotton or acrylic yarn is a reliable, widely available choice that holds its shape well. Cotton tends to give crisper stitch definition, while acrylic is often more affordable and comes in a wider range of holiday colors.
Can I make mini stockings without a set pattern? You can improvise a simple flat design using basic increases and decreases to shape the heel and toe, but following a tested pattern will give you more consistent, symmetrical results, especially for your first attempt.
Do I need to stuff a mini crochet stocking? Not necessarily. Many mini stockings are left flat, especially if they’ll be used as ornaments, gift tags, or place cards. Light stuffing is optional if you want a more dimensional, amigurumi-style look.
Where can I find supplies for a crochet Christmas stocking project? Craft stores and general retailers typically expand their holiday yarn and trim selections in the fall, with clearance pricing often available after Christmas for stocking up on supplies for next year.
How do I attach a hanging loop to a mini crochet stocking? Chain a small loop of stitches at the top corner of the cuff and secure it with a few extra stitches or a knot, or sew on a folded length of ribbon. Reinforce the attachment point well, since it needs to support the stocking’s weight.
Final Thoughts
Mini crochet christmas stockings patterns offer a satisfying mix of nostalgia, speed, and creative freedom. They’re small enough to finish quickly, simple enough for a first-time amigurumi or holiday project, and flexible enough to dress up with different colors, textures, and personal touches. Once you’ve made one, you’ll likely find yourself making several more — they’re the kind of project that’s hard to stop at just one.