Crochet Cherry Bandana: A Sweet, Beginner-Friendly Pattern Idea
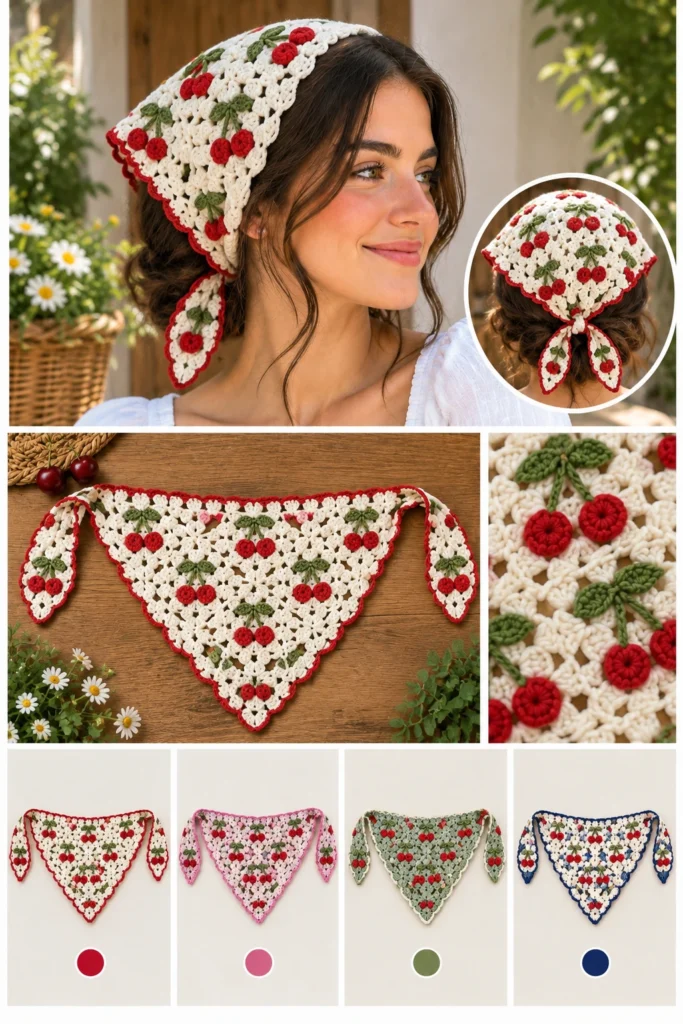
If you’ve been searching for a fun, fast project that feels a little more personal than the usual granny square, a crochet cherry bandana might be exactly what you’re after. It’s playful, it’s easy to customize, and it turns a basic bandana shape into something with real personality — a pair of stitched cherries, a curled stem, and maybe a little leaf tucked in for good measure.
Whether you’re making it for a dog, a doll, a baby, or just because cherries are cute, this project is a great excuse to practice color changes and simple shaping while ending up with something genuinely wearable.
What Makes This Crochet Project Special
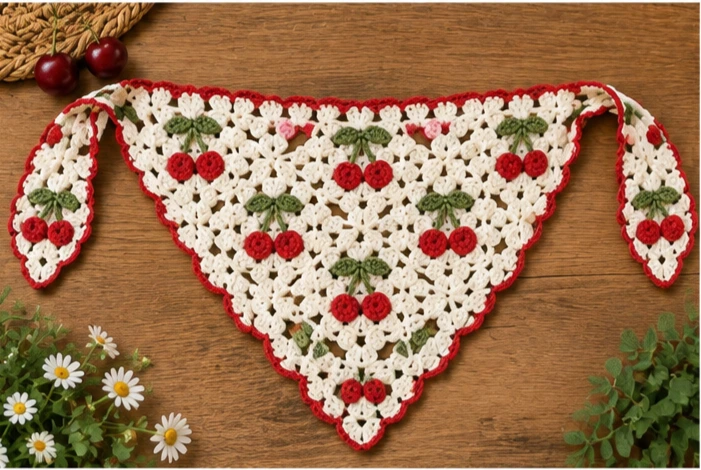
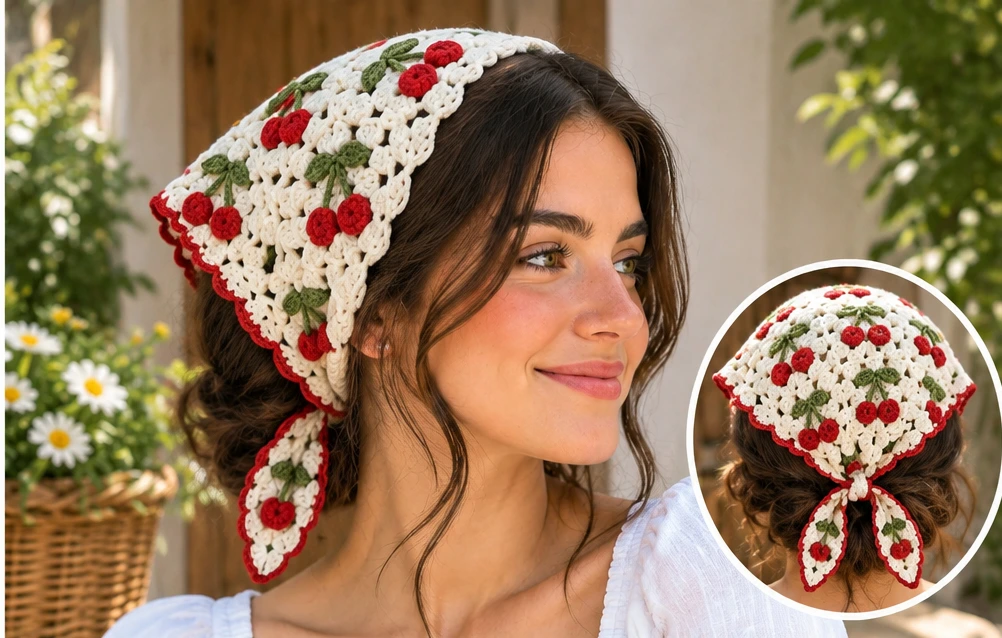
A cherry bandana works because it takes a familiar shape — the classic triangle or rectangle bandana — and adds a small, charming detail on top. The cherry motif is instantly recognizable: two rounded shapes in a warm red or pink, joined by a slim stem, sometimes with a tiny green leaf.
Part of the appeal is the contrast. The base of the bandana is usually kept simple, in a solid neutral or soft color, so the cherry detail has room to stand out. That makes it a satisfying project even for someone newer to crochet — you don’t need advanced stitches to get an eye-catching result, just clean color work and a bit of patience with the small cherry shapes.
It’s also a flexible pattern. The cherry can be crocheted as a small appliqué and sewn on, or worked as part of the design from the start, depending on how you like to construct things. Either approach gives you a finished piece that looks intentional and well-made.
Materials You May Need
Exact yarn weight, hook size, and finished measurements will depend on the specific pattern you’re following and who (or what) the bandana is for, so treat this as a general starting list rather than a fixed spec:
- Yarn — A worsted weight or DK weight cotton or cotton-blend yarn is a common choice for bandanas because it holds its shape and drapes nicely without becoming too heavy. Acrylic works fine too, especially if the bandana will be washed often.
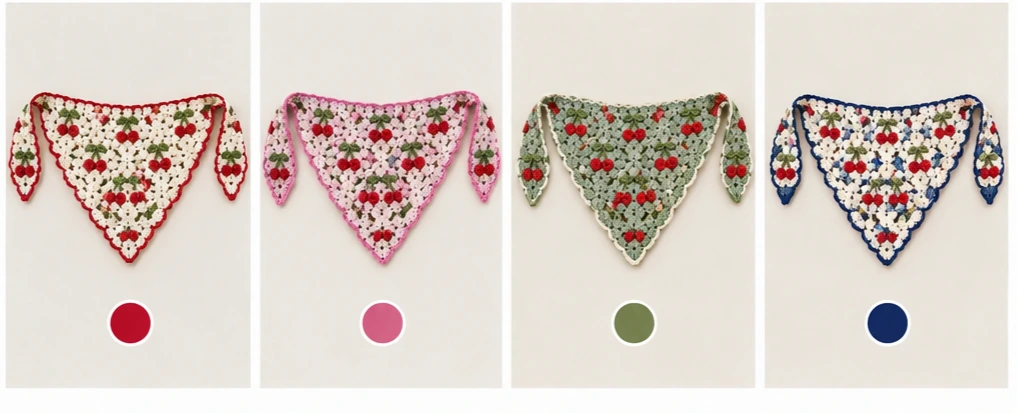
- Yarn colors — A neutral or solid main color (white, cream, denim blue, or a soft pastel are popular) plus a red or pink for the cherries and a green for the stem and leaf.
- Crochet hook — Sized to match your yarn weight; check the yarn label for a suggested hook range and adjust based on your own tension.
- Yarn needle — For weaving in ends and sewing the cherry motif in place if it’s made separately.
- Scissors
- Stitch marker — Helpful for keeping track of rounds if the cherries are worked in the round.
- Optional: fabric glue or fusible interfacing — If you want extra structure at the bandana’s tie points.
If you’re working from a specific pattern, always defer to the materials list provided there, since hook size and yarn amount can shift the finished size and drape.
How to Make It
There’s more than one way to build a crochet cherry bandana, but most versions follow the same general process: crochet the bandana base, then add the cherry detail.
Step 1: Choose Your Bandana Shape
Decide whether you want a classic triangle bandana (common for pets and babies) or a rectangular kerchief style. Triangle bandanas are usually worked either from the center point outward with increases on either side, or from the long top edge downward with decreases toward the tip.
Step 2: Crochet the Base
Work your base in the main color using a simple, consistent stitch — single crochet or half double crochet rows are common because they create a sturdy, flat fabric that shows off the cherry detail without competing with it. Keep your tension even from row to row so the fabric lies flat rather than curling or flaring.
Step 3: Make the Cherries
The cherries are typically two small, rounded shapes, each worked in the round starting from a magic ring (or a small chain ring if you prefer) and increased over a couple of rounds until you reach the size you want. Once each cherry ball is stitched, stuff it lightly if you want a bit of dimension, then close it off.
Step 4: Add the Stem and Leaf
Chain a short length in green yarn to form the curved stem connecting the two cherries, and slip stitch it in place. A simple leaf can be made with a few chain stitches and single or double crochet worked back along the chain to build a pointed shape, or embroidered directly onto the bandana with a few straight stitches if you’d rather skip a separate leaf piece.
Step 5: Attach the Cherry Motif
Position the finished cherry-and-stem piece where you want it on the bandana — most people place it slightly off-center near one edge — and sew it down neatly using a yarn needle and matching thread color.
Step 6: Finish the Edges and Ties
Add a border round if you’d like a cleaner edge, and finish with ties. Ties can be crocheted chains, twisted cord, or simple fabric ribbon threaded through, depending on the look you want.
Tips for a Better Result
- Pick a yarn with good stitch definition. A tightly plied cotton or cotton-blend yarn will show off the cherry shape more clearly than a fuzzy or heavily textured yarn.
- Go with high contrast colors. Red or pink cherries stand out best against white, denim, or a muted pastel base — pairing red on red, for example, will hide your hard work.
- Watch your tension when switching colors. Pulling too tight at a color change can pucker the fabric; aim for the same tension you use throughout the rest of the piece.
- Stuff cherries lightly, not firmly. Since they’re decorative rather than a full amigurumi piece, a small amount of fiberfill (or none at all, if you prefer a flatter look) usually looks more natural.
- Block the bandana before attaching ties. A quick steam or wet block helps the base lie flat and evens out any minor tension inconsistencies.
- Weave in ends securely. With multiple colors involved, you’ll have several yarn tails — weave each one in along a seam or stitch line so it doesn’t show through on the right side.
Top 4 Crochet Trends
1. Fruit and Food Motifs
Small fruit and food-shaped appliqués — cherries, strawberries, lemons, and mushrooms among them — have become a popular way to personalize otherwise simple crochet projects. You can lean further into this on your bandana by adding a tiny second fruit motif, like a small leaf cluster or a second cherry pair, to build out a mini fruit theme.
2. Cottagecore and Retro-Inspired Color Palettes
Soft, slightly muted colors paired with classic motifs like cherries fit neatly into the ongoing cottagecore and vintage-inspired aesthetic. Try a cream or sage green base with a deep, slightly dusty red for the cherries instead of a bright primary red for a softer, more retro feel.
3. Pet Accessories as a Crochet Category
Crochet items made specifically for pets — bandanas, collars, sweaters — have grown into their own popular niche as more makers create accessories for dogs and cats alongside human-focused projects. If you’re making this for a pet, consider a snap or slip-knot closure instead of ties for a secure, comfortable fit.
4. Appliqué-Style Embellishments
Rather than working a complex colorwork pattern directly into a piece, many crocheters are attaching small, separately worked appliqués to plain bases — exactly the approach a cherry bandana uses. This method makes it easy to reuse the same cherry motif on other projects, like a matching tote bag or a hair clip.
Styling and Ideas
- Make a matching set: a cherry bandana paired with a simple crochet headband or hair clip using the same cherry appliqué.
- Use it as a pet accessory for a summer photo or seasonal outfit.
- Add a small cherry bandana to a baby gift alongside a onesie or blanket.
- Swap the cherries for a different fruit motif using the same base pattern if you want variety without starting from scratch.
- Attach a small bell or fabric tag near the stem for a pet version with a bit of extra charm.
FAQs
Is a crochet cherry bandana a good beginner project? Yes, in most versions. The bandana base uses basic stitches worked in simple rows or rounds, and the cherry motif, while it involves a color change, doesn’t require advanced techniques. It’s a good project for practicing color work without a large time commitment.
What yarn is best for a crochet bandana? A cotton or cotton-blend yarn in a worsted or DK weight is a popular choice because it holds shape well and feels comfortable against skin or fur. Acrylic is a budget-friendly, easy-care alternative if you’d rather avoid cotton.
How many inches should a crochet bandana be? This depends entirely on who or what it’s for. A pet bandana is generally sized to the neck measurement of the dog or cat, while a bandana for a baby, child, or adult will be scaled up accordingly. Always check the specific pattern’s sizing guide or measure the intended wearer before starting.
Can I make the cherries without stuffing them? Yes. A lightly stuffed cherry gives a bit of dimension, but you can also crochet the cherry motif flat or with minimal fill for a more subtle, appliqué-like look.
How do I keep my color changes clean when adding the cherry stem? Carry or cut yarn depending on the distance between color sections, and always change colors on the last yarn-over of a stitch so the new color starts cleanly. Keeping tension even on both colors helps avoid gaps or puckering at the join.
Can I turn this into a keychain or accessory instead of a bandana? Yes. The cherry motif on its own works well as a keychain charm, a bag clip, or a small pin if you’d rather skip the full bandana and just make the fruit detail.
Are crochet bandanas still popular? Simple crochet accessories, including bandanas, have remained a steady favorite because they’re quick to make, useful, and easy to customize with different colors and motifs like this cherry design.
Final Thoughts
A crochet cherry bandana is a small project with a lot of personality. It’s forgiving enough for a confident beginner, quick enough to finish in an evening or two, and easy to adapt with different colors, sizes, or motifs once you’ve got the basic method down. Whether you’re making one for a pet, a child, or yourself, it’s a satisfying way to practice color work while ending up with something genuinely fun to wear.