How to Crochet a Spider Web: A Simple Step-by-Step Guide
Halloween decorating gets a handmade upgrade when you learn how to crochet a spider web. This simple project turns basic stitches into a striking design that works as a wall hanging, a table topper, or an accent piece woven into a wreath. It comes together with just a few materials and no complicated shaping, which makes it a great pick for anyone who wants a seasonal project that looks impressive but doesn’t take all week to finish.
Whether you’re new to crochet or just looking for a quick fall craft, this guide walks through everything you need to make your own web from scratch.
What Makes This Crochet Project Special
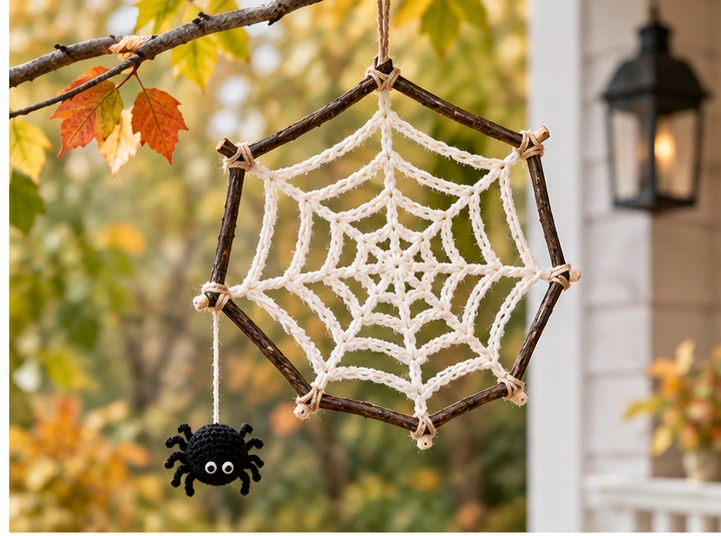
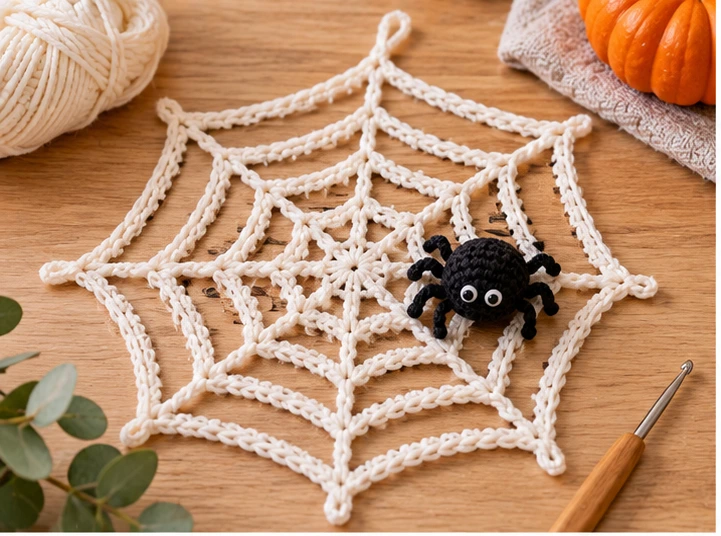
A crocheted spider web has a graphic, almost architectural look that’s different from most amigurumi or wearable projects. Instead of building up rounds to create volume, you’re working outward from a center point to form radiating “spokes” connected by rings — similar in concept to a dreamcatcher, but with a spookier finish.
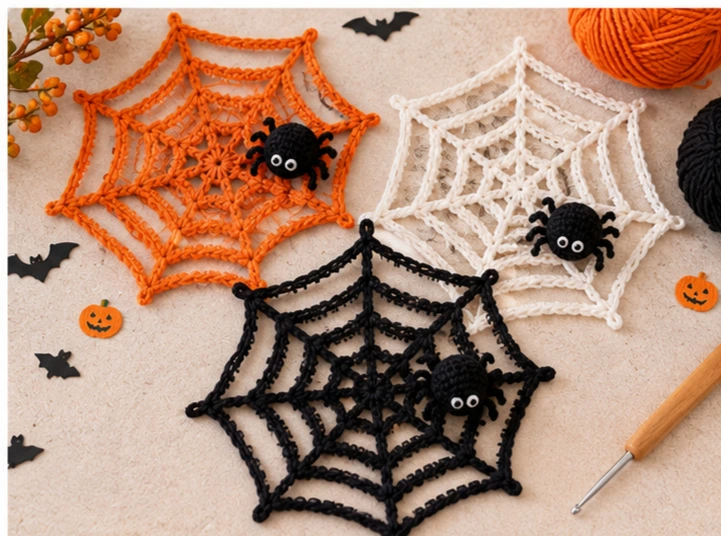
Part of the appeal is how flexible it is. You can make it tiny enough for earrings or big enough to stretch across a doorway. Black yarn against a lighter background gives it that classic Halloween silhouette, but there’s nothing stopping you from using metallic thread, white yarn against black fabric, or even pastel colors for a softer, less spooky version. It’s also a satisfying project to watch develop, since the web shape becomes recognizable early on.
Materials You May Need
- Yarn in black (traditional) or any color you prefer — a smooth worsted-weight yarn or a thinner crochet thread both work, depending on how delicate you want the final piece to look
- A crochet hook sized to match your yarn weight (check the yarn label for a general recommendation)
- Scissors
- A yarn needle for weaving in ends
- A stitch marker (helpful for keeping track of your starting point in each round)
- Optional: a hoop, ring, or frame if you want to mount the web for display
- Optional: fabric stiffener or spray starch if you want the web to hold its shape without support
Exact yardage will depend on how large you make your web, so it’s worth having an extra skein on hand if you’re planning a bigger piece.
How to Make It
Starting the Center
Begin with a foundation ring, either a magic ring or a small chain joined into a loop. This center point is where all the “spoke” lines of your web will originate, so keep it snug to avoid a gap in the middle.
Building the Spokes
From the center ring, chain outward to create each spoke. These are the straight lines that radiate outward like the arms of an asterisk. A basic web usually uses somewhere between six and eight spokes, spaced evenly around the circle, though you can adjust this depending on how full you want the web to look.
Connecting with Rings
Once your spokes are in place, work back through them with single crochet or slip stitches to reinforce each line, then begin adding connecting rounds. These are the rings that cross the spokes at intervals, gradually widening as they move outward — this is what gives the piece its recognizable web pattern. Each connecting round should link to every spoke as you go around, keeping the spacing between rounds fairly even so the web looks balanced rather than lopsided.
Finishing the Outer Edge
When your web reaches the size you want, fasten off on the outermost ring. Weave in all loose ends carefully, since a spider web pattern has many more yarn tails than most projects due to the number of spokes.
Tips for a Better Result
- Choose yarn with good stitch definition. A tightly spun, smooth yarn shows off the web lines more clearly than a fuzzy or highly textured one.
- Keep tension consistent. Since the structure relies on straight spokes and even rings, uneven tension is more noticeable here than in a solid, stitched piece.
- Use a stitch marker on your first spoke so you always know where each new round begins.
- Block the finished web by pinning it out on a flat surface (or spraying lightly with fabric stiffener) to help it lie flat and hold its circular shape.
- Count your spokes before you start connecting rounds. It’s much easier to fix an uneven spoke count early than after the connecting rings are in place.
Top 4 Crochet Trends
1. Nature-Inspired Home Décor
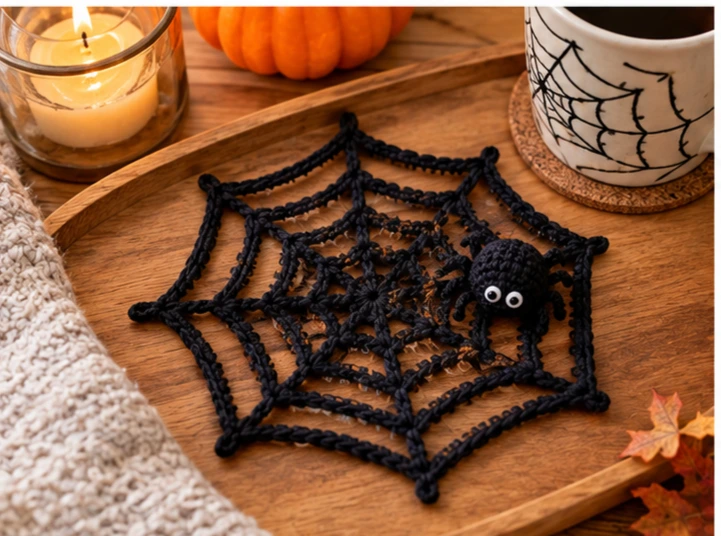
Handmade décor featuring organic shapes — leaves, mushrooms, and webs among them — has become a popular way to bring texture into a room without relying on mass-produced items. A crochet spider web fits naturally into this trend as a piece that feels both handcrafted and seasonally appropriate, especially when displayed in a simple hoop or frame.
2. Amigurumi and Crochet for Holiday Decorating
Crocheters increasingly look for holiday-specific projects that go beyond the usual knit ornaments. A spider web pairs easily with a small crocheted spider, pumpkin, or bat to build out a mini Halloween display, giving you room to expand the project into a themed set.
3. Fiber Art and Wall Hangings
Yarn-based wall art, from macramé to woven tapestries, has carried over into crochet as makers look for ways to display their work rather than tuck it away. Mounting your web on a wooden hoop or embroidery frame turns it into a piece you can hang year after year, not just during October.
4. Slow, Mindful Crafting
There’s a renewed interest in projects that are relaxing to make rather than rushed. A spider web‘s repetitive spoke-and-ring structure makes it a good “mindful” project — simple enough to work on while watching TV, but with just enough structure to keep your attention.
Styling and Ideas
- Mount a finished web inside an embroidery hoop for an easy, ready-to-hang decoration.
- Pair a black web with a small amigurumi spider sewn into one corner for extra Halloween charm.
- Make a set in graduated sizes to layer on a mantel or table.
- Try metallic or glow-in-the-dark yarn for a web with a bit of sparkle after dark.
- Attach a web to gift wrap or a small treat bag for a handmade Halloween gift topper.
- Scale it down and stiffen it with fabric starch to make lightweight web-shaped earrings or ornaments.
FAQs
Is crocheting a spider web hard for beginners?
Not particularly. The stitches themselves — chains, slip stitches, and single crochet — are all beginner-level. The main challenge is keeping the spokes evenly spaced and your tension consistent, which just takes a little practice.
What yarn works best for a crochet spider web?
A smooth, worsted-weight yarn in black is the traditional choice because it shows the web’s lines clearly. Thinner crochet thread creates a more delicate, lace-like look if you prefer a finer finished piece.
How do I keep my spider web from curling or losing its shape?
Blocking helps a lot. Pinning the piece flat while slightly damp, or using a light spray of fabric stiffener, will help it hold its round shape once it dries.
Can I turn a crochet spider web into a wearable piece, like a top or accessory?
Yes, though this typically requires a different construction than a flat, standalone web, since you’d need to shape the stitch pattern to fit a body or garment. If you’re aiming for a wearable version, look for a pattern specifically designed for that purpose rather than adapting a flat web on your own.
Conclusion
A crochet spider web is one of those projects that delivers a lot of visual impact for a relatively simple set of stitches. Once you understand the basic spoke-and-ring structure, you can size it up, size it down, or change the color palette to fit whatever look you’re going for. Whether you’re decorating for Halloween or just want a fun fiber art piece to hang on the wall, this is a project worth adding to your crochet list.