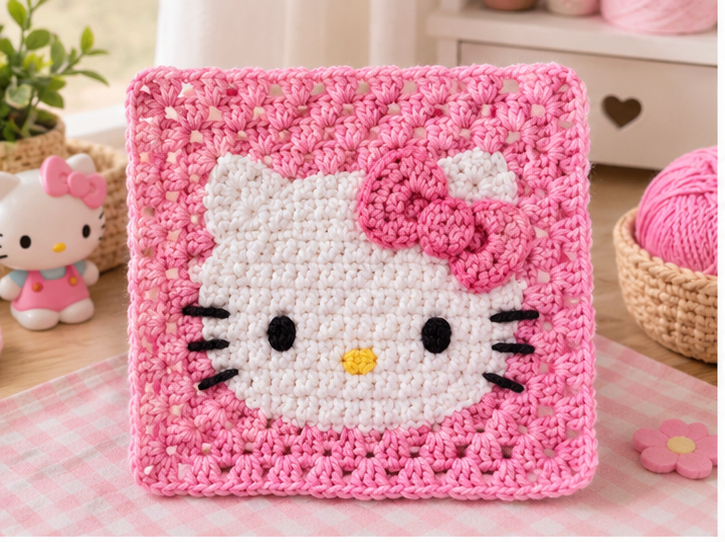
Hello Kitty Blanket Square: A Solid Granny Square with a Sweet Kitty Face
A Hello Kitty blanket square is one of the friendliest ways to try character crochet. Each square is small and quick to finish, and you can stitch one or seventy without changing the recipe. This tutorial builds a solid granny square as the base, then adds a simple white face, ears, whiskers, and a red bow. You’ll also find size math for turning the squares into a full blanket.
What Makes This Crochet Project Special
The Hello Kitty blanket square mixes two things crocheters already love: the comfort of a granny square and the charm of a kawaii character. The design is simple by nature. Hello Kitty is recognizable from a few basic shapes (a round white face, two small ears, dot eyes, whiskers, and a bow), so you don’t need advanced colorwork to get a good result.
Working in squares also makes the project flexible. You can make one for a pillow or wall hanging, a few for a lap blanket, or enough for a full throw. Because the squares are portable, they’re good for travel, gifting, and using up stash yarn.
Materials You May Need
Exact yarn and hook choices depend on the look you want, so treat these as starting points.
- Yarn: Soft worsted-weight (medium) yarn in a background color, plus white, red, black, and a small amount of yellow. A machine-washable acrylic or cotton blend is practical for blankets.
- Hook: A size that gives a dense, sturdy fabric with your yarn, often around 5 mm for worsted weight. Check the yarn label for guidance.
- Tools: Yarn needle, scissors, stitch markers, and pins for positioning the face.
- Optional: Felt or embroidery floss for the eyes and nose if you prefer not to embroider with yarn.
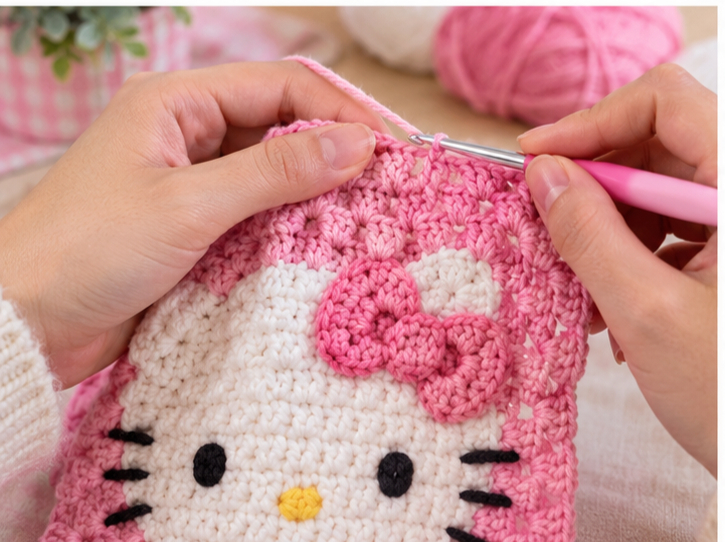
How to Make a Hello Kitty Blanket Square
Stitches are in US terms: ch (chain), sl st (slip stitch), sc (single crochet), dc (double crochet), inc (two sc in one stitch), sc2tog (single crochet two together).
Step 1: Crochet the Solid Granny Square Base
In your background color, chain 4 and join with a sl st to form a ring.
Round 1: Ch 3 (counts as a dc). Work 2 dc into the ring, ch 2. Work 3 dc into the ring, ch 2. Repeat 2 more times. Join to the top of the beginning ch-3. You now have four groups of 3 dc and four corner spaces (12 dc).
Round 2: Sl st across to the first corner space. Ch 3, then work (2 dc, ch 2, 3 dc) in that corner. Dc in each of the next 3 stitches. In the next corner, work (3 dc, ch 2, 3 dc), then dc in each of the next 3 stitches. Repeat around, and join (36 dc).
Round 3 and beyond: Repeat Round 2, working a dc in every stitch along each side and (3 dc, ch 2, 3 dc) in every corner. Each side gains 6 stitches per round. Side counts are 3, 9, 15, 21, and so on. Total dc is 12, 36, 60, 84, and so on.
Stop when the square is the size you want. With worsted yarn and a medium hook, four to five rounds often lands around 5 to 7 inches, but a swatch will tell you for sure.
Step 2: Make the Face
Use white yarn and work in continuous rounds.
Round 1: Magic ring, 6 sc (6).
Round 2: Inc in each stitch (12).
Round 3: Sc, inc, repeat 6 times (18).
Round 4: 2 sc, inc, repeat 6 times (24).
Round 5: 3 sc, inc, repeat 6 times (30).
Sl st, fasten off, and leave a tail for sewing. The circle will be slightly rounder than the character’s wider face. Gently stretch it sideways when you pin it, or make it a bit wider by adding a stitch or two per side.
Step 3: Make the Ears
Make two. In white, ch 5.
Row 1: Sc in the second ch from the hook and in each ch across (4).
Row 2: Ch 1, turn. Sc2tog twice (2).
Row 3: Ch 1, turn. Sc2tog (1).
Fasten off, leaving a tail.
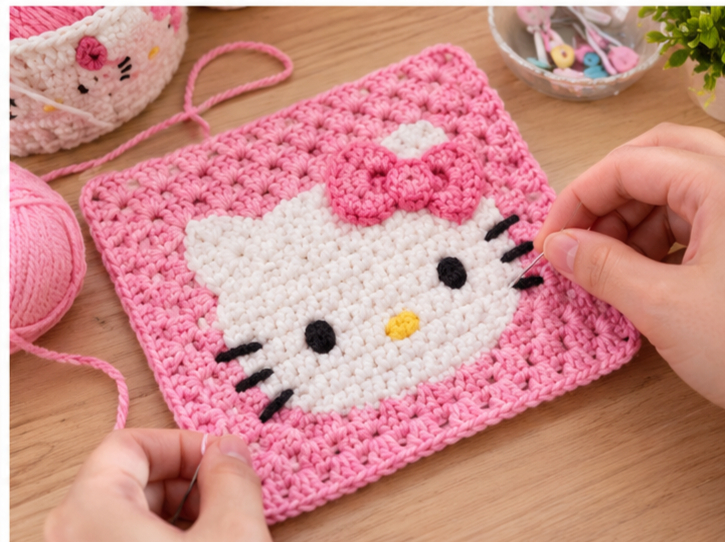
Step 4: Make the Bow
In red, ch 11. Sc in the second ch from the hook and across (10). Work 9 more rows of 10 sc, chaining 1 and turning each time. Fasten off. Wrap a short red strand tightly around the middle of the rectangle to pinch it into a bow, and secure it on the back. The finished size will vary with your yarn and tension.
Step 5: Add Details and Assemble
- Pin the ears just behind the top edge of the face, then sew them on.
- Center the face on the granny square. Sew it down with small whip stitches.
- Embroider two black eyes with short vertical straight stitches or French knots.
- Add a small yellow nose in the center, slightly below the eyes.
- Stitch three black whiskers on each side with straight stitches.
- Sew the bow at one ear’s base, off-center.
- Weave in all ends.
Tips for a Better Result
- Swatch first. A solid dc square uses more yarn and is heavier than a lacy classic granny. A quick swatch confirms your gauge and yarn needs.
- Choose contrast. A white face shows best on a pastel, red, or soft gray background. If your background is very light, outline the face with a thin backstitch.
- Keep tension even. Uneven squares are hard to join, so use the same hook and yarn for all of them.
- Use pins. Pin the face before sewing so it sits centered and the whiskers line up.
- Block the squares. A light steam or wet blocking helps all squares land at the same size before joining.
- Add stability. Backstitch the face edges or add a few tacking stitches so it doesn’t shift with washing.
Top 4 Crochet Trends
Patchwork Granny Square Blankets
Blankets made from many small squares remain popular because they’re portable and easy to customize. Make a set of Hello Kitty squares and alternate them with plain solid squares for a patchwork look.
Kawaii and Character Crochet
Cute, character-inspired designs are a growing part of amigurumi and blanket projects. Try a few facial variations, such as sleeping eyes or different bow colors, so the blanket doesn’t feel repetitive.
Soft Pastel and Muted Palettes
Gentle color schemes remain a favorite for baby and nursery projects. Use pastel pink, mint, or lavender backgrounds with the white face and a slightly deeper red bow.
Textured and Dimensional Details
Raised and appliqué elements add interest to flat squares. Make the bow a stuffed or layered piece, or use a bobble for the nose.
Styling and Ideas
- Baby blanket: Use embroidered features only and skip any small parts.
- Full throw: Alternate character squares with plain ones for a balanced pattern.
- Pillow cover: Make one large square, or join four for a cushion front.
- Gift set: Add a matching washcloth or mini-square coaster.
- Wall hanging: Frame a few squares in a hoop for a nursery or dorm.
- Seasonal twist: Swap the bow for a small hat or heart.
If you plan to sell finished items, remember that Hello Kitty is a licensed character, so check the rules before selling.
FAQs
How many granny squares does it take to make a blanket?
It depends on square and blanket size. With 6-inch squares, a 50 x 60 inch throw needs about 80 (8 by 10). A 30 x 36 inch baby blanket needs about 30 (5 by 6). Add extra if you plan a border.
What is a good size for a granny square blanket?
Squares between 5 and 8 inches are common. Smaller squares mean more joining but easier portability. Larger ones work up faster with fewer seams.
Is there a solid granny square pattern?
Yes. The base in this tutorial is a solid granny square worked with a dc in every stitch and (3 dc, ch 2, 3 dc) in each corner.
Which crochet stitch isn’t a yarn eater?
Classic granny clusters with chain spaces use less yarn than solid dc. Solid squares are denser and use more, so plan for extra yardage.
Conclusion
A Hello Kitty blanket square is a gentle, rewarding project: one small square at a time, with an easy face and a bow that make each one feel special. Start with a single square, check your size, and grow it into whatever you want to make.