Halloween Bunny Crochet: A Fun, Spooky-Cute Amigurumi Project for Fall
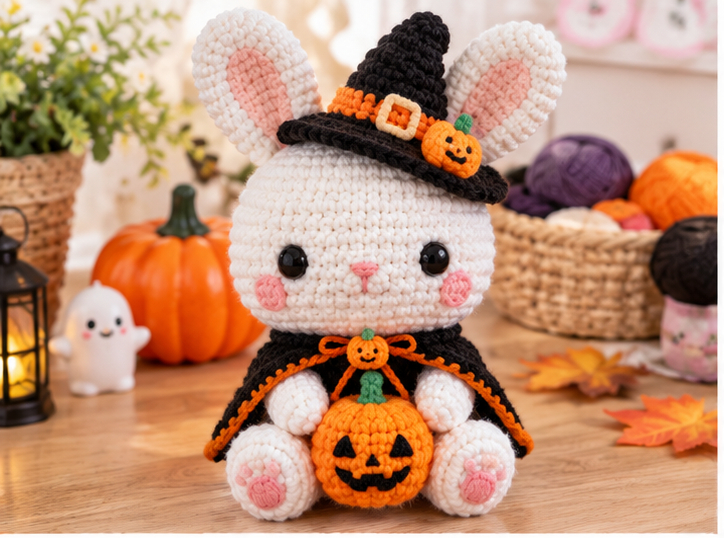
Halloween bunny crochet projects are a perfect way to blend two beloved crafting traditions: amigurumi and seasonal decor. If you love making soft, huggable stuffed animals but want something with a festive autumn twist, a Halloween-themed bunny gives you the best of both worlds. It keeps the classic charm of a crochet bunny while adding playful details like pumpkin patches, witch hats, or orange-and-black color combinations that instantly say “October.”
This project works well whether you’re crocheting for your own home, making handmade gifts, or building up inventory for a fall craft fair. Below, you’ll find everything you need to plan, make, and finish your own halloween bunny crochet piece, along with styling ideas and answers to common questions.
What Makes This Crochet Project Special
A Halloween bunny stands out because it combines two strong visual themes: the softness and innocence of a bunny shape with the spooky, playful energy of Halloween styling. Instead of a plain amigurumi rabbit, you get a character piece — something with personality that fits a specific time of year.
The appeal comes from contrast. Bunnies are typically associated with spring and softness, so dressing one up as a tiny witch, ghost, or pumpkin creates a fun visual surprise. This makes the finished piece great for seasonal shelf displays, tiered tray decor, or as a stuffed toy that rotates in during October and gets put away afterward.
Because amigurumi bunnies are usually made with basic stitches worked in the round, this project is accessible to confident beginners while still offering enough customization to keep experienced crocheters interested.
Materials You May Need
Exact yarn weight, hook size, and finished dimensions will vary depending on the specific pattern you choose or design yourself, so treat the list below as a general starting point rather than fixed specifications:
- Worsted weight cotton or acrylic yarn in your main bunny color (white, cream, gray, or brown are common choices)
- Contrast yarn for Halloween accents — typically orange, black, and purple
- A crochet hook sized appropriately for your yarn weight (often somewhere in the 3.5–4.5 mm range for worsted weight amigurumi, but always check your yarn label)
- Polyester fiberfill stuffing
- Safety eyes, or embroidery floss if you prefer stitched eyes for safety reasons
- A yarn needle for sewing pieces together
- Stitch markers to track rounds
- Scissors
- Optional: small amounts of felt or extra yarn for accessories like a pumpkin, hat, or bat wings
How to Make It
Getting Your Base Shape Started
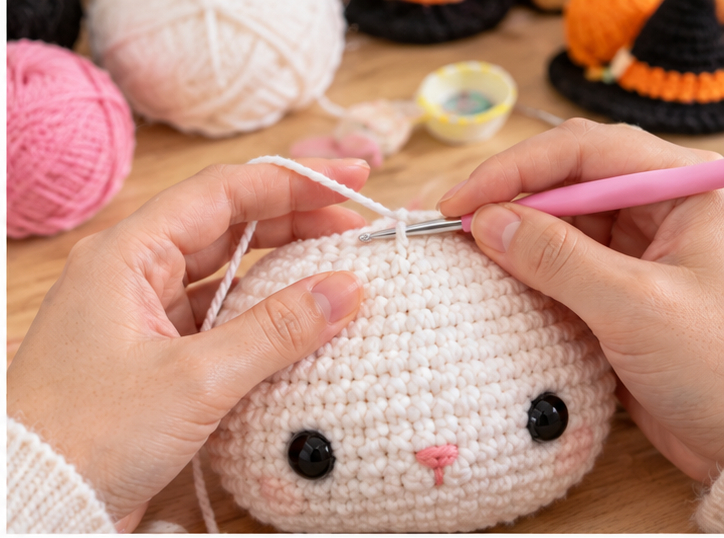
Most amigurumi bunnies begin with the head, worked from a magic ring and increased round by round to form a rounded shape. The body typically follows a similar method, often worked slightly larger or smaller than the head depending on the proportions you want.
Building the Ears
Bunny ears are usually made as flat or slightly shaped pieces, then folded and attached to the head. Long, floppy ears give a classic look, while shorter, upright ears create a more alert, playful expression.
Adding Arms and Legs
Small limb pieces are crocheted separately, stuffed lightly, and sewn onto the body. Keeping the stuffing light in these areas helps the limbs move and pose naturally once assembled.
Assembling the Bunny
Once all pieces are complete, sew the head to the body, then attach the ears, arms, and legs. Take your time here — placement affects the final expression and posture more than any other step.
Adding the Halloween Details
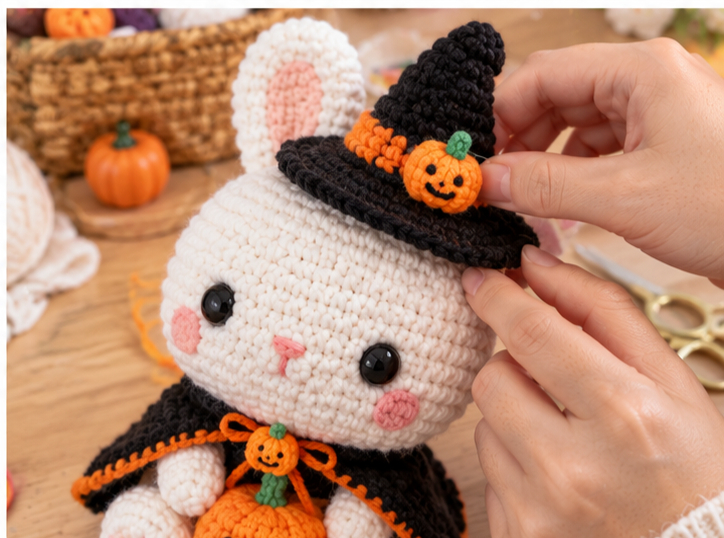
This is where the project becomes seasonal. Common options include:
- Crocheting a small pumpkin to hold or wear
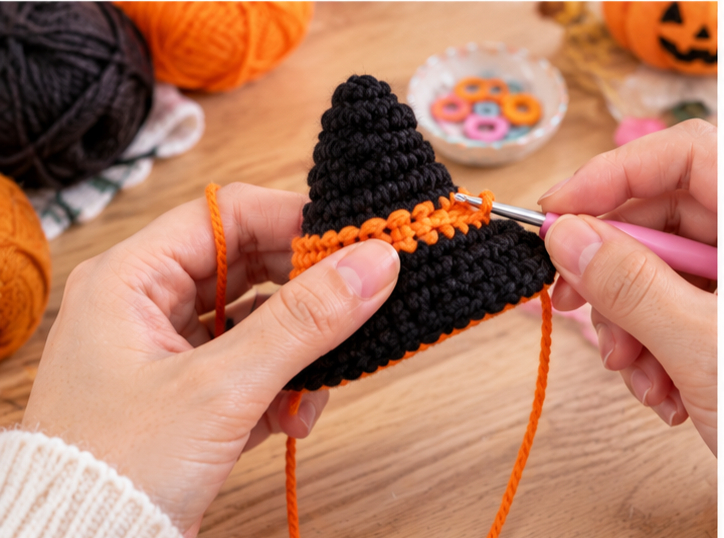
- Adding a tiny witch hat made from a cone shape and brim
- Using orange and black stripes on a sweater or scarf
- Embroidering a simple jack-o’-lantern face onto an accessory
Tips for a Better Result
- Choose yarn with good stitch definition. Cotton or a cotton-acrylic blend tends to show stitches more clearly than fuzzy or textured yarn, which makes shaping easier to control.
- Pick a cohesive color palette. Sticking to two or three main colors (like cream, orange, and black) keeps the design looking intentional rather than busy.
- Keep tension consistent. Amigurumi relies on tight stitches to keep stuffing from showing through, so try to crochet at an even tension throughout.
- Stuff firmly but evenly. Add stuffing in small amounts as you go rather than all at once, checking the shape regularly.
- Weave in ends securely. Since these pieces are handled often, especially if made as toys, secure all yarn tails well to prevent unraveling.
- Block flat pieces if needed. Accessories like hat brims or flat pumpkin leaves can benefit from light steam blocking to lay flatter.
Top 4 Crochet Trends
1. Amigurumi with Seasonal Costumes
Rather than making an entirely new toy for each holiday, many crocheters are designing base animal shapes that can be dressed in removable seasonal outfits. For your halloween bunny crochet project, consider making the hat or pumpkin accessory detachable so the bunny can transition to a different look later in the year.
2. Muted, Earthy Halloween Palettes
Bright orange and black are still popular, but many makers are shifting toward softer, muted tones — terracotta, mustard, sage, and deep plum — for a more autumnal, less cartoonish look. Try swapping traditional bright orange for a burnt orange or rust shade for a more modern feel.
3. Chunky, Textured Yarn Accents
Adding a chunky yarn scarf, collar, or hat trim gives amigurumi extra texture and dimension. A small strip of bulky yarn wrapped around the bunny’s neck can add cozy, tactile interest without changing the overall pattern.
4. Mix-and-Match Amigurumi Accessories
Instead of one fixed design, crocheters are building small wardrobes of interchangeable accessories — hats, bows, scarves, and props — that can be swapped onto a single base toy. This approach works especially well for a Halloween bunny, since you can reuse the same base bunny for other holidays simply by changing the accessories.
Styling Ideas
- Display your finished bunny on a tiered fall tray alongside mini pumpkins and candles.
- Attach a small loop and hang it as part of a Halloween garland.
- Make several in different color palettes for a themed shelf collection.
- Turn it into a handmade gift by pairing it with a fall-scented candle or seasonal treat.
- Create a mini version as a bag charm or keychain for a wearable Halloween accessory.
FAQs
Is halloween bunny crochet a good beginner project?
Yes, especially if you’re already comfortable with basic amigurumi stitches like single crochet, increases, and decreases. The seasonal accessories are usually simple additions rather than complex techniques.
What size hook should I use for an amigurumi bunny?
This depends on your yarn weight. For most worsted weight yarns, a hook in the 3.5–4.5 mm range is common, but always check the yarn label and adjust based on your own tension.
Can I make the bunny without safety eyes?
Yes. Embroidered eyes using floss are a safer alternative, especially for toys intended for young children, since safety eyes can pose a choking hazard.
How do I make the Halloween accessories removable?
Instead of sewing hats or accessories directly onto the bunny, attach them with a small loop of elastic thread, a snap, or a simple tie so they can be taken on and off easily.
Conclusion
A halloween bunny crochet project is a simple, rewarding way to bring a seasonal twist to a classic amigurumi shape. With a thoughtful color palette, a few festive accessories, and some basic stitching techniques, you can create a piece that feels handmade, personal, and perfectly suited for fall. Whether you’re crafting for your own home or as a gift, this project offers plenty of room to make it uniquely yours.