Hello Kitty Keychain Pattern: A Beginner-Friendly Amigurumi Bag Charm
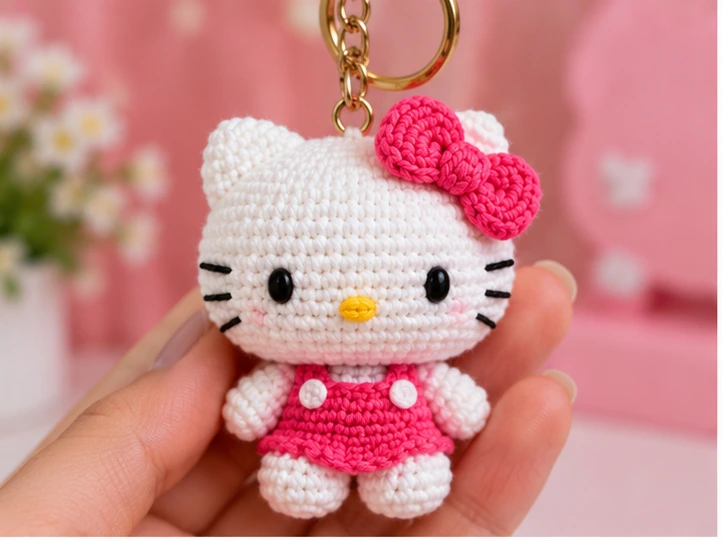
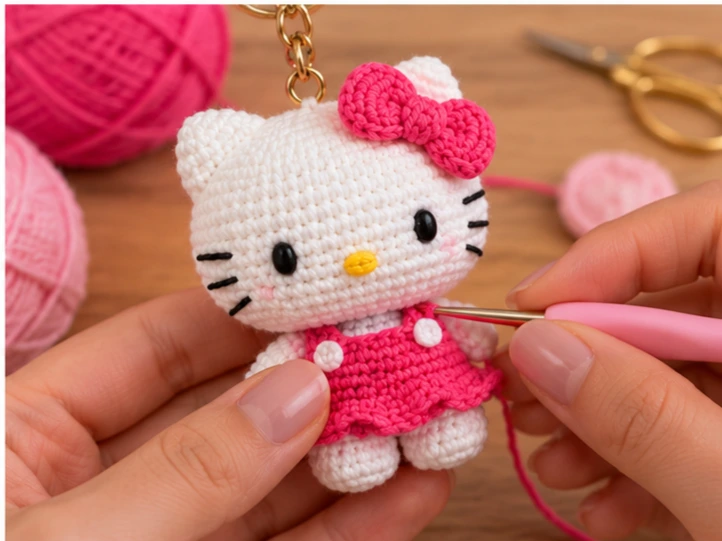
Small crochet keychains are a good way to practice amigurumi without committing to a big plush. This Hello Kitty keychain pattern gives you a simple, flattened round head, two small ears, a bow, and a stitched face. It works as a bag charm, zipper pull, or small gift. You’ll get a working starting pattern, finishing tips, and ideas for making it your own.
What Makes This Crochet Project Special
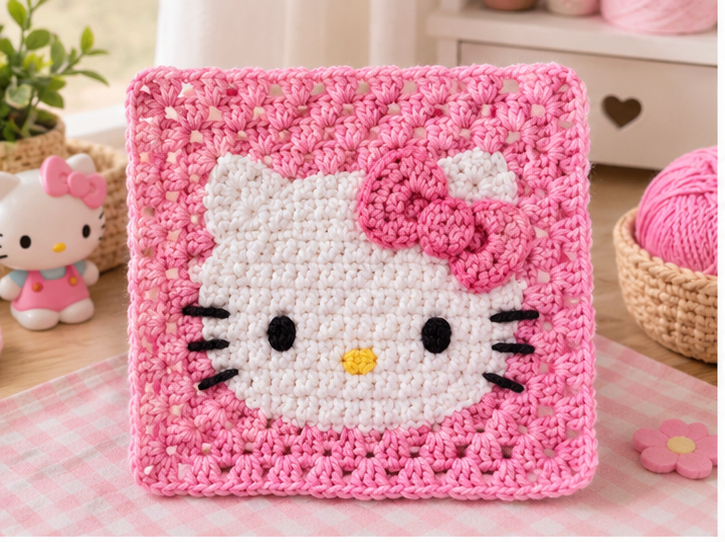
Hello Kitty’s design is very simple: a wide white head, small triangular ears, a bow, oval eyes, and a tiny yellow nose. That makes her well suited to crochet. There are no limbs to attach, and you only need a few colors of scrap yarn.
The head is wider than it is tall, so it looks cute even when your stitches are a bit uneven. It also uses only basic amigurumi skills: a magic ring, increases, decreases, and simple embroidery.
Note: Hello Kitty is a licensed Sanrio character. This pattern is intended for personal use and gifts. Selling finished items may require permission.
Materials You May Need
Exact yarn and hook choices change the finished size, so treat these as starting points:
- Yarn: Smooth cotton or acrylic in white, red (or your bow color), yellow, and black scraps
- Hook: One size smaller than your yarn label suggests, so the fabric is tight enough to hide the stuffing
- Fiberfill: A small amount
- Keychain hardware: A jump ring and clasp, or a split ring
- Yarn needle, scissors, and stitch marker
- Optional: 6 mm safety eyes (embroidered eyes are safer for young children)
- Optional: Pins for testing face placement
How to Make This Hello Kitty Keychain Pattern
This is a starting pattern in US terms. Work in continuous rounds and mark the first stitch of each round. Your finished size depends on yarn and hook, so gauge doesn’t need to be exact here. Just keep your tension firm.
Abbreviations: MR = magic ring, sc = single crochet, inc = two sc in one stitch, dec = single crochet decrease, sl st = slip stitch, ch = chain.
Head (white)
- R1: 6 sc in MR (6)
- R2: inc in each stitch (12)
- R3: (sc, inc) x 6 (18)
- R4: (2 sc, inc) x 6 (24)
- R5: (3 sc, inc) x 6 (30)
- R6: (4 sc, inc) x 6 (36)
- R7–R10: sc in each stitch (36)
- R11: (4 sc, dec) x 6 (30)
- R12: (3 sc, dec) x 6 (24)
- R13: (2 sc, dec) x 6 (18)
Stuff firmly but not to bulging, and add a little more as you close.
- R14: (sc, dec) x 6 (12)
- R15: dec x 6 (6)
Fasten off, weave the tail through the front loops of the last six stitches, pull tight, and hide the end.
Ears (make 2, white)
- R1: 6 sc in MR (6)
- R2: (sc, inc) x 3 (9)
- R3: sc in each stitch (9)
Fasten off, leaving a long tail. Flatten each piece and pinch it into a soft triangle. Don’t stuff the ears.
Bow (red or your choice)
Ch 11. Sc in the second chain from the hook and across (10). Work 5 more rows of 10 sc, chaining 1 and turning each time. Fasten off, leaving a tail. Wrap the tail tightly around the middle of the rectangle, pinching it into a bow shape, and secure it at the back.
Assembly
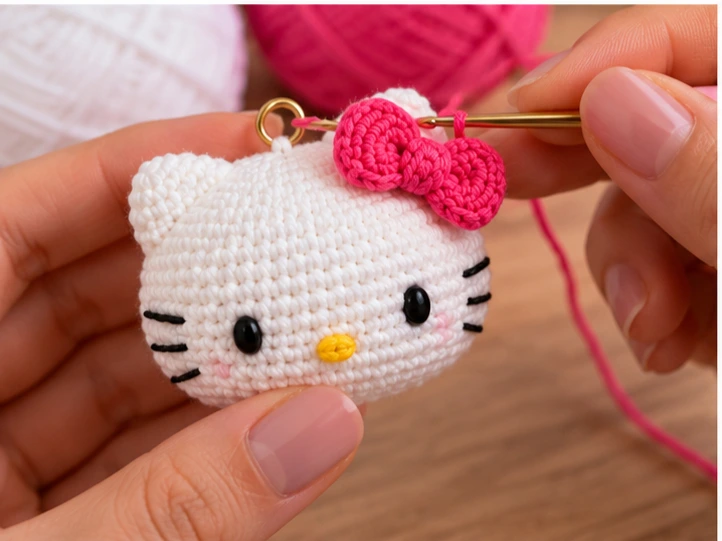
- Pin the ears to the top of the head, around rounds 3–5, leaving a small gap between them.
- Sew the ears on with whip stitch, catching only the front loops of the ear edges.
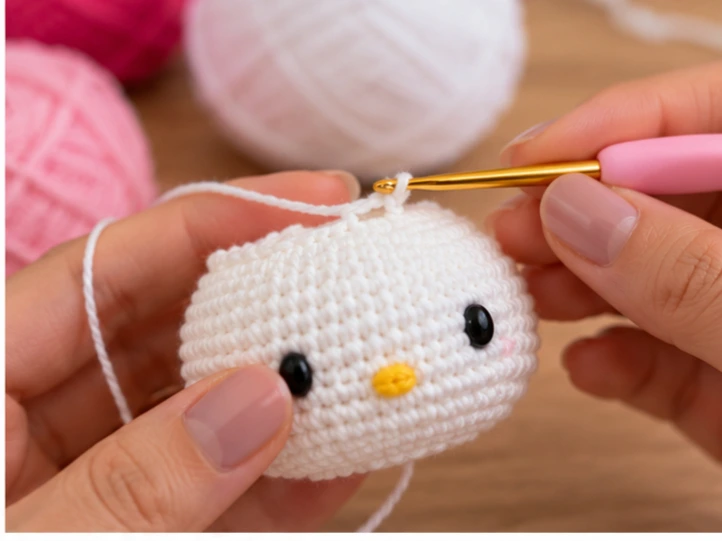
- Pin the eyes about 10–12 stitches apart, around rounds 8–9. Check the placement before committing.
- Embroider the eyes as small black ovals, or add safety eyes before stuffing.
- Stitch a small yellow oval nose between and slightly below the eyes.
- Add three short whiskers on each side with black yarn, pulled snug so they lie flat.
- Sew the bow at the base of one ear. Traditionally this is her left ear, on the viewer’s right.
- Sew a short yarn loop or a jump ring to the top center of the head, then attach the clasp.
Tips for a Better Result
Choose smooth yarn. Fuzzy yarn makes stitches hard to see and softens the whisker and nose details. Cotton or a smooth acrylic gives cleaner shapes.
Keep your tension tight. A loose fabric shows fiberfill through the stitches, which is especially noticeable on white. A smaller hook fixes this.
Test the face with pins. Face placement makes or breaks the finished look. Keep the eyes wide apart and low on the head.
Stuff in small pieces. Small tufts help you avoid lumps, and the head should hold a flattened round shape.
Hide your ends thoroughly. Keychains get handled and tugged, so weave tails in securely and knot them where possible.
Top 4 Crochet Trends
Bag Charms and Accessories
Small crochet pieces on bags, zippers, and keys are popular right now. Make your keychain a bit sturdier by using double-strand keychain hardware or a short crocheted strap, so it can handle daily use.
Nostalgic Kawaii Characters
Cute characters from earlier eras are a big draw for crafters. Lean into this with a classic pastel color palette, or make a small set of matching characters to display together.
Stash-Busting Mini Makes
Many crocheters use up leftover yarn on small projects. This keychain uses only scraps, so try unusual colors for the bow, or make several with a different bow color each.
Embroidered Details Over Add-Ons
Stitched eyes and features give a clean, flat look and avoid small parts that can fall off. Use a satin stitch for the eyes and nose, and keep the whiskers long enough to give balance.
Styling / Ideas
- Gift set: Make three with different bows for a friend group.
- Color swaps: Try seasonal bows, such as red for winter or pastel for spring.
- Other characters: Adapt the base shape with different ears, colors, and face details for another Sanrio favorite.
- Larger version: Use thicker yarn and a bigger hook for a plush-style pillow or shelf decoration. Test the size with a swatch first, since face placement will shift.
- Zipper pull: Skip the clasp and sew a short loop directly to a zipper tab.
- Gift tag topper: Attach it to a wrapped present as an extra gift.
FAQs
Is amigurumi hard to learn?
Not usually. The main skills are the magic ring, single crochet, and increases and decreases. A small keychain like this is a good first project because mistakes are easy to fix.
How long does a small crochet keychain take?
It depends on your speed and yarn. Small keychains can be quick, often an hour or two for experienced crocheters. Embroidery and assembly usually take longer than the crocheted pieces.
Where can I buy supplies for crochet keychains?
Craft stores like Michaels and Hobby Lobby typically carry yarn, hooks, fiberfill, and keychain hardware, though stock varies by location. Online shops also sell safety eyes and jump rings.
Is crochet easier than knitting?
Many people find crochet easier at first because you work with one hook and one live stitch at a time. Small crocheted projects also suit beginners well because they hold their shape.
Conclusion
This Hello Kitty keychain pattern is an easy way to make a charming charm with scraps and a little patience. Take your time with the face placement and stitch tension, and you’ll have a keepsake worth carrying. Once you’ve made one, try a new bow color or a different character for the next.