The 3-Ingredient Peanut Butter Cookie That Proves Simple Baking Isn’t Cheating
I’ve spent years in professional kitchens obsessing over laminated dough, tempered chocolate, and cookies with seventeen ingredients that all need to be at exactly the right temperature. And yet, one of the recipes I come back to more than almost any other calls for three things you probably already have in your kitchen right now: peanut butter, sugar, and an egg.
That’s it. No flour. No baking soda. No butter to cream. If you’ve never made these before, it feels almost like a trick — like you’re skipping a step somewhere. You’re not. This is one of those rare recipes where “simple” and “good” aren’t in conflict, and once you understand why it works, you’ll never look at your pantry the same way again.
Key Takeaways Before You Start
- Three ingredients, no substitutions needed: peanut butter, sugar, and one egg — that’s the whole list.
- No flour means no gluten development, which is exactly why these cookies come out soft and slightly fudgy instead of cakey.
- The fork crosshatch isn’t decoration — it actually controls how the cookie bakes and prevents it from staying raw in the middle.
- Crumbly dough is almost always fixable, and I’ll show you exactly how.
- They firm up as they cool, so don’t panic if they look underbaked straight out of the oven.
Why This Recipe Works (A Quick Word From the Kitchen)
Here’s the thing most recipes won’t tell you: peanut butter isn’t just a flavor here, it’s doing the job that flour and butter normally split between them. It provides fat (for tenderness), protein (for structure), and enough natural stickiness to hold the dough together once the egg binds everything and the sugar caramelizes at the edges.
That’s why the type of peanut butter you use actually matters — more on that in the FAQ below, because it’s one of the most common questions bakers have with this exact recipe.
The Recipe: Step by Step
Yield: About 18–20 cookies Prep time: 10 minutes Bake time: 8–10 minutes
Instructions:
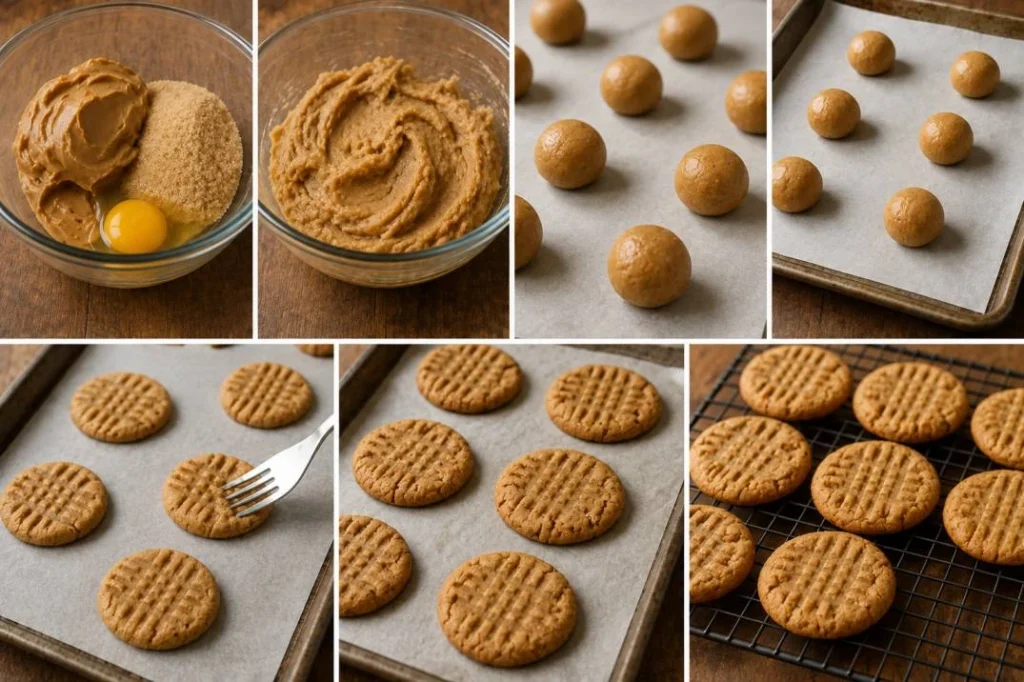
- Preheat your oven to 350°F (175°C). Line a baking sheet with parchment paper. Don’t skip the parchment — with no flour to buffer things, these cookies can stick more than you’d expect.
- Combine the three ingredients in a bowl. Add the peanut butter, sugar, and egg together and mix until you get a smooth, cohesive dough. You can use a stand mixer, a hand mixer, or honestly just a sturdy spoon and some elbow grease. There’s no creaming technique to worry about here — you’re just bringing everything together evenly.
- Portion the dough. Scoop out about a tablespoon of dough per cookie and roll it into a ball between your palms. Consistent sizing here matters more than it seems — it’s the difference between a tray of cookies that all finish baking at the same time and one where half are burnt while the rest are raw.
- Space them on the tray. Leave about 2 inches between each ball — they’ll spread more than you’d think for something with no flour.
- Flatten with a fork, crosshatch style. Press the tines of a fork into the top of each ball, then rotate 90 degrees and press again to create that classic crosshatch pattern. This isn’t just for looks — it helps the thick dough bake through evenly instead of staying gooey in the center while the edges overbake.
- Bake for 8–10 minutes. You’re looking for edges that are just set and starting to turn golden, while the centers still look slightly soft. This is the step where most beginners overbake — remember, they’ll continue cooking on the hot tray after you pull them out.
- Cool on the baking sheet for 5 minutes before moving. This is non-negotiable. Straight out of the oven, these cookies are fragile enough to fall apart if you try to lift them too soon. Once they’ve had a few minutes to set on the tray, transfer them to a wire rack to finish cooling completely.
Where Beginners Usually Go Wrong
I’ll be honest with you — in professional kitchens, we see the same handful of mistakes over and over with recipes like this, and almost all of them come down to timing or ingredient choice rather than technique.
Rushing the cooling step is the single biggest one. The dough is held together by egg proteins and melted sugar, both of which need time and cooling air to firm back up into a solid structure. Pull a cookie off the tray too early, and it will crumble in your hand even if it was baked perfectly.
Overbaking “to be safe” is the second. Because there’s no flour to visually signal doneness the way a golden cookie crust normally does, beginners tend to leave these in too long, worried they’re underdone. Trust the residual heat — a slightly soft center at the 8-minute mark is exactly what you want.
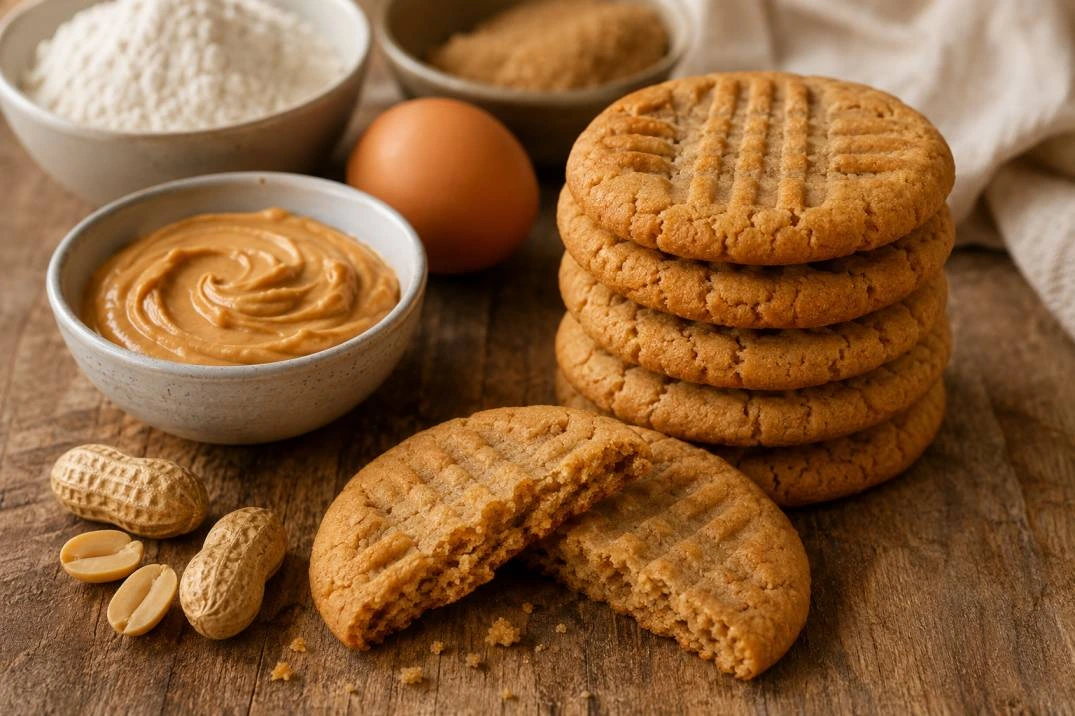
3-Ingredient Peanut Butter Cookies (Easy Flourless Recipe)
Ingredients
Notes
Frequently Asked Questions
What could be the reason for my 3-ingredient peanut butter cookies crumbling?
This almost always comes down to one of two things: you tried to move them before they cooled, or your peanut butter was too dry or oily (natural peanut butter with separated oil is a common culprit). Allow a full 5-minute rest on the tray, and if your peanut butter appears to be excessively oily or dry, stir it well or add a bit more. — before mixing your dough.
Do peanut butter cookies harden as they cool?
Yes, and this is completely normal. They’ll look soft and almost underdone the moment they come out of the oven, but as the sugar and egg proteins set during cooling, they firm up into that classic slightly-chewy, slightly-crumbly texture. If you want a firmer, more snap-forward cookie, let them cool completely before eating.
Can you use all-natural peanut butter for cookies?
You can, but it’s trickier. Natural peanut butter separates, with oil rising to the top, and if you measure it without stirring thoroughly, your ratio of fat to solids gets thrown off — usually resulting in greasier, flatter cookies. If natural peanut butter is what you have, stir it very well (including scraping the bottom of the jar) before measuring, and consider chilling the dough for 15 minutes before baking to help it hold shape.
What occurs if peanut butter cookies are not flattened?
Without flattening, the dough balls stay thick and dense in the center, which means the outside can brown or even burn before the middle finishes cooking. The fork crosshatch isn’t just tradition — it actually thins the dough enough for even, reliable baking, and it happens to look great too.
Final Thoughts
What I love about this recipe is that it strips baking down to its essentials and still delivers something genuinely good. No special equipment, no hard-to-find ingredients, no advanced technique — just three things you already own and ten minutes of your time. It’s the kind of recipe that’s perfect for baking with kids, for a last-minute craving, or for proving to yourself that you don’t need a pantry full of specialty flours to make something worth sharing.
Give it a try this week, and if your first batch doesn’t come out perfect, don’t worry — now you know exactly why, and exactly how to fix it next time. If you make these, I’d genuinely love to hear how they turned out and what you paired them with — drop a comment below and let me know.