How to Cook Chicken Gravy From Scratch — And Actually Get It Right
Rich, velvety, and ready in under 30 minutes. No powdered packets. No shortcuts. Just real flavor.
🕒 30 minutes👤 Beginner-friendly🍽 Serves 4–6
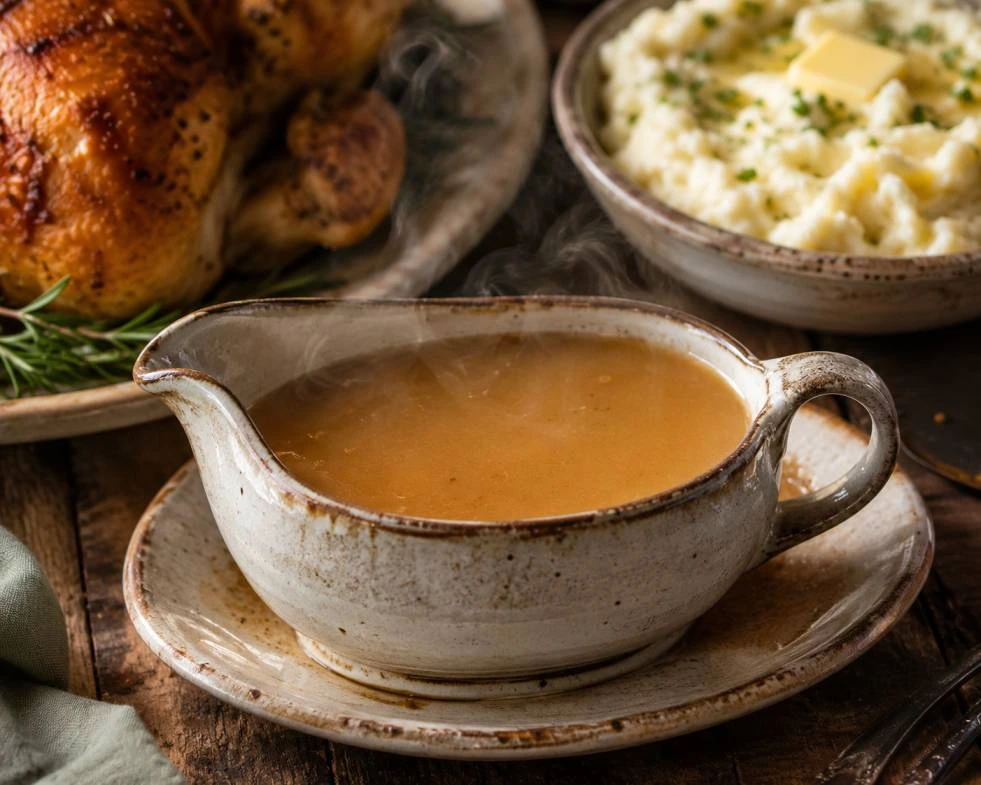
Classic Chicken Gravy From Scratch
Rich, smooth, and deeply savory — using the 3-2-1 rule.

Chicken Gravy From Scratch (Rich, Smooth & Foolproof)
Ingredients
What you’ll learn in this guide
- The 3-2-1 rule that makes perfect gravy every single time
- The most common mistake home cooks make — and how to avoid it
- The one secret ingredient that transforms good gravy into great gravy
- Whether you can enjoy chicken gravy if you have GERD or diabetes (short answer: yes, with a few tweaks)
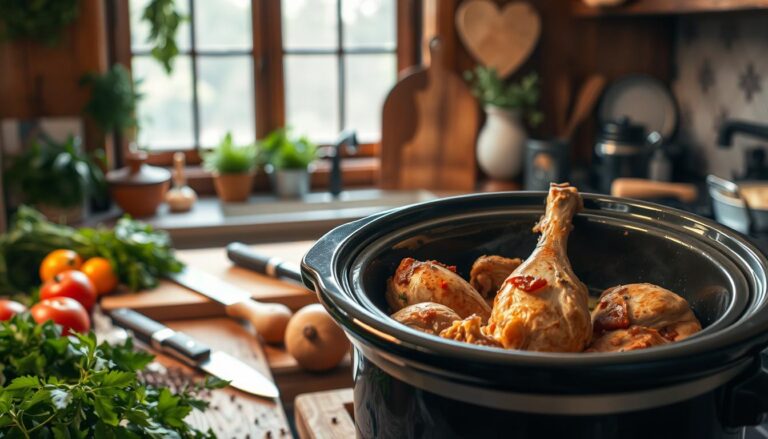
- How to cook raw chicken directly in the gravy — safely and deliciously
Let me be honest with you. The first time I made chicken gravy from scratch, it was a lumpy, grayish disaster that tasted like nothing and looked like wet cement. I poured it down the sink and called it a lesson.
That was over fifteen years ago. Now I make it without thinking — and once you understand the three things that actually matter, you will too. This isn’t complicated cooking. It’s patient cooking, and there’s a big difference.
What Makes Chicken Gravy Truly Good?
Before we even touch a pan, let’s talk about what we’re aiming for. Great chicken gravy has three qualities: it’s smooth (no lumps, ever), it’s deeply savory — that rich, almost meaty depth that makes you want to pour it on everything — and it has body. It coats the back of a spoon. It clings to your mashed potatoes and doesn’t slide off like water.
Most gravy fails at one of those three points. Either it’s lumpy because the roux wasn’t done right, flat because there was no real flavor base, or watery because not enough time was given for it to reduce. We’re going to fix all of that today.
Step-by-Step Instructions:
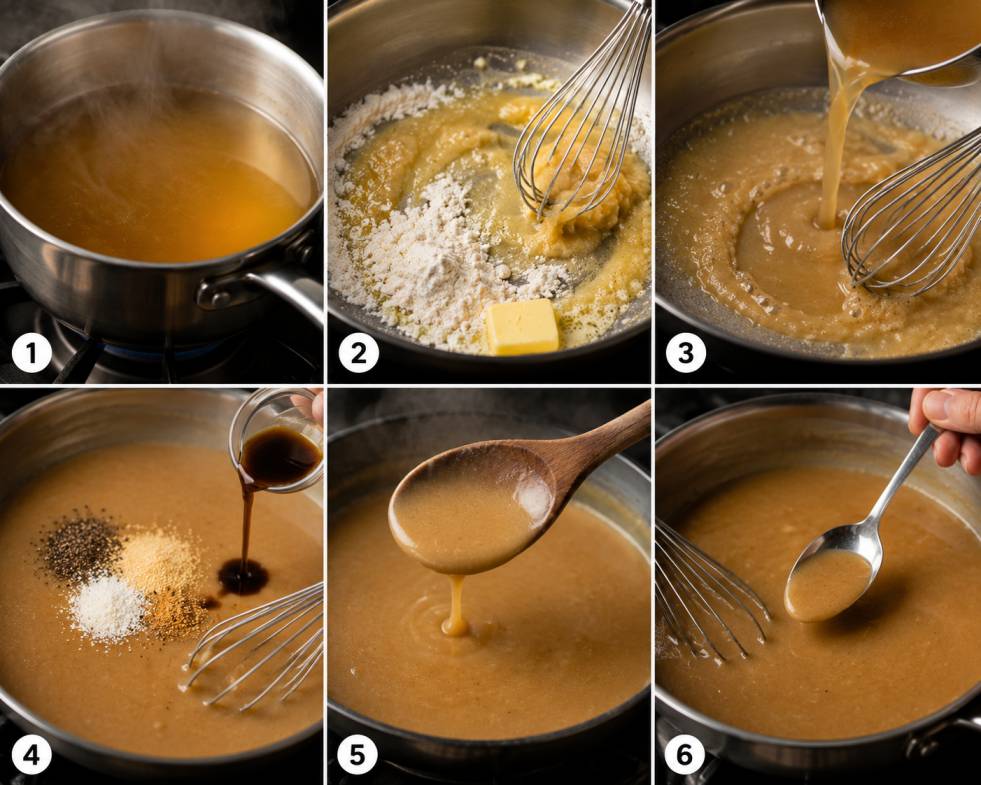
1- Warm your stock first
Pour your chicken stock into a small saucepan and heat it gently over low heat. Cold stock hitting a hot roux is one of the main causes of lumps. Warm stock blends smoothly and instantly. This one step alone changes everything.
2 – Build the roux — the 3-2-1 rule.
In a medium saucepan over medium heat, melt 3 tablespoons of butter. Once it foams, add 2 tablespoons of flour. Whisk constantly for 1 to 2 minutes. You’re cooking out the raw flour taste. The mixture will look pale golden and
3 – Add the warm stock — slowly.
Pour your warm stock into the roux in a slow, steady stream while whisking constantly. Don’t dump it all in at once. Add a splash, whisk until smooth, add more, whisk again. This is where patience pays off. Keep going until all the stock is incorporated and the mixture is completely smooth.
4 – Season and add your secret weapon.
Add the garlic powder, onion powder, a pinch of salt, and plenty of black pepper. Now add 1 teaspoon of Worcestershire sauce. This is the ingredient most people don’t expect. It adds a background umami depth that makes people ask “what is that flavor?” without being able to name it. It’s subtle, but it’s the difference.
5 – Simmer until it coats a spoon.
Reduce the heat to low and let the gravy simmer gently for 8 to 10 minutes, stirring occasionally. It will thicken as it cooks. To check if it’s ready, dip a spoon and run your finger across the back — if the line holds clean, your gravy is done.
6 – Taste and adjust.
Always taste at the end. Add more salt, a tiny pinch of pepper, or a small squeeze of lemon if it needs brightness. If it’s too thick, whisk in a splash more warm stock. If it’s too thin, let it simmer another 3 to 5 minutes uncovered.
⚑ Chef’s Tip
Can you cook raw chicken directly in the gravy? Yes — absolutely. Add boneless chicken thighs or breasts directly into the finished gravy, bring it to a gentle simmer, cover, and cook for 20 to 25 minutes on the stovetop (or 35 minutes in a 350°F oven). The chicken stays incredibly moist and infuses the gravy with even more flavor. Just make sure the internal temperature of the chicken reaches 165°F before serving.
The Mistakes That Ruin Good Gravy
I’ve watched a lot of people make gravy, and the errors are almost always the same. Cold liquid added too fast. Flour that wasn’t cooked long enough, leaving a pasty, raw taste. Heat that was too high, causing the gravy to scorch on the bottom before it thickened. And — the biggest mistake — not tasting as you go.
Gravy is a living thing on the stovetop. It changes from minute to minute. That’s not a problem — that’s the whole point. Stay with it. Stir it. Taste it. Adjust it. The best gravy you’ve ever had came from someone who was paying attention.
Making It Healthier Without Losing Flavor
Here’s something I hear a lot: “I’d love to make this, but I have to watch what I eat.” Whether that’s GERD, diabetes, or just trying to eat cleaner — you don’t have to give up chicken gravy. You just adjust the recipe slightly, and honestly, the results are still delicious.
For a lighter, GERD-friendly version, skip the black pepper and use low-sodium stock. Replace the butter with just one tablespoon of olive oil and increase the stock slightly to compensate. Avoid anything acidic (so skip the lemon at the end). Serve it over simple steamed chicken — it’s gentle, comforting, and still genuinely satisfying.
For a diabetes-friendly gravy, the main thing to watch is the flour. You can use a smaller amount of arrowroot powder as a thickener instead — it works just as well, and there’s less carbohydrate impact overall. Keep the sodium low by using homemade or low-sodium stock, and serve it with chicken breast, which is one of the best protein sources for blood sugar management. Paired with non-starchy vegetables, this is a meal you can feel good about.
Frequently Asked Questions :
Can you have gravy if you have GERD or acid reflux?
It depends on how it’s made. Traditional gravy — especially rich, fatty gravies made with drippings from red meat — can trigger reflux in many people because of the high fat content and sometimes the pepper or garlic. However, a lighter chicken gravy made with lean stock, minimal butter, and no pepper is generally much gentler on the stomach. The key is avoiding the common triggers: fat, spice, and acidic additions like lemon or wine. If you’re managing GERD, start with a small portion and see how your body responds. And of course, always check with your doctor if you’re dealing with a serious condition.
What is the 3-2-1 rule for gravy?
The 3-2-1 rule is the most reliable ratio for a smooth, lump-free gravy: 3 tablespoons of fat (butter, oil, or drippings), 2 tablespoons of flour, and 1 cup of liquid (stock or broth). This ratio creates a roux that’s strong enough to properly thicken the liquid without making the gravy taste floury or feel starchy. Once you’ve memorized this, you can scale it up or down for any amount of gravy you need — it always works.
What is the secret ingredient that makes gravy taste amazing?
Most chefs won’t tell you this, but the answer is almost always Worcestershire sauce — just a small teaspoon added near the end of cooking. It doesn’t taste like Worcestershire sauce in the finished gravy; it dissolves into the background and amplifies the savory, meaty flavor in a way that’s hard to explain but impossible to miss. Other close runners-up include a tiny pinch of miso paste stirred in at the end, or a small splash of soy sauce. All three do the same thing: they add umami, which is the fifth taste that makes food feel full and satisfying rather than flat.
Can people with diabetes eat chicken gravy?
Yes — with some adjustments. The main concern for diabetics is carbohydrate content (from the flour used as a thickener) and sodium. Using a smaller amount of flour or swapping to arrowroot powder reduces the carb load. Choosing low-sodium or homemade chicken stock keeps salt in check. And pairing the gravy with chicken breast — one of the leanest, lowest-carb proteins available — makes it an excellent choice for blood sugar management. A diabetic-friendly chicken gravy, served over grilled chicken breast with steamed vegetables, is a genuinely healthy and satisfying meal.
Ready to Make It Tonight?
Grab a pan, warm your stock, and give this recipe a try. Real chicken gravy from scratch takes less than 30 minutes — and once you’ve tasted it, the packet stuff simply won’t cut it anymore.
Have a question or a variation you love? Drop it in the comments below — I read every one.