Turkey Brine: Simple Basics & Easy Recipe Guide
Around the table, everyone waits with anticipation. Then comes the first bite—and their eyes light up. The meat is tender, deeply flavorful, and nothing like the dry turkey you may have served in years past.
That kind of result isn’t luck. It comes down to one simple method: using a proper Turkey Brine. It may sound complicated at first, but it’s actually one of the easiest techniques to master.
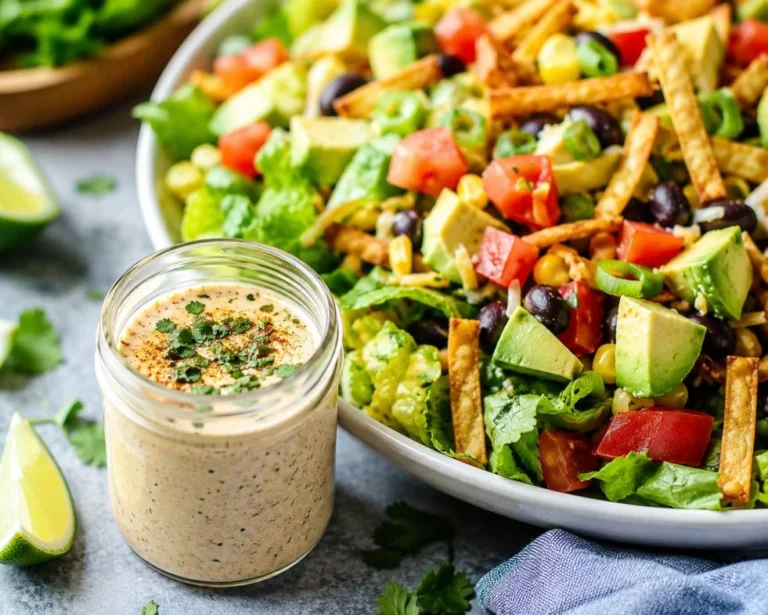
A Turkey Brine is a simple mix that transforms your bird from ordinary to unforgettable. In most cases, you already have everything you need in your kitchen—water, salt, and a few basic aromatics. Nothing fancy required.
Many trusted cooks, including The Pioneer Woman, proudly call themselves “brine believers.” And for good reason. Anyone who has tried it knows how much it changes the final result. A Turkey Brine keeps the meat moist during cooking and infuses flavor deep inside—not just on the surface.
In this guide, you’ll learn exactly how to brine a turkey from beginning to end. You’ll understand why the process works, get a simple step-by-step method, and discover the same techniques used in professional kitchens.
By the end, you’ll feel confident preparing a Turkey Brine that makes your guests wonder what your secret is.
Key Takeaways
- A Turkey Brine helps keep turkey juicy by allowing salt to break down proteins and lock in moisture.
- A basic Turkey Brine only requires water, salt, and optional everyday seasonings.
- Getting the salt-to-water balance right is essential to avoid an overly salty bird.
- Most turkeys need about 8 to 16 hours in a Turkey Brine for the best results.
- Wet brining is popular because it produces tender, juicy meat in a relatively short time.
- After brining, the turkey should be rinsed and dried to ensure crispy, golden skin when roasting.
- The same Turkey Brine technique can also be used for chicken, turkey breasts, and other poultry.
Why Brining Your Turkey Makes All the Difference
Turkey is naturally lean, which means it can dry out quickly during cooking. A standard roasted turkey often ends up tough or stringy when it hasn’t been treated in advance. A wet Turkey Brine method solves this problem by preparing the meat before it ever reaches the oven.
Brining isn’t just about salt—it changes the structure of the meat itself. This simple step helps the turkey stay juicy, tender, and full of flavor.
The Science Behind Moisture Retention
When the turkey is placed in a salt solution, its proteins begin to change. The salt helps break down muscle fibers, making the meat less tight and more tender.
At the same time, moisture is drawn into the meat through osmosis. The turkey slowly absorbs liquid, which it then holds onto during cooking. This extra internal moisture is what keeps the final result juicy.
| Brining Stage | What Happens | Result |
|---|---|---|
| Before Brining | Turkey is lean and naturally dry | Higher risk of tough texture |
| During Brining | Salt penetrates muscle fibers | Meat absorbs and retains moisture |
| After Brining | Moisture is locked inside | Juicy, tender turkey after roasting |
How Salt Transforms Lean Turkey Meat
Salt does much more than season the surface. In a Turkey Brine, it penetrates deep into the muscle tissue, seasoning the bird from the inside out.
It also changes how the proteins behave, helping the meat hold onto water even under high heat. As a result, the turkey stays moist while roasting, instead of drying out.
The benefit is simple but powerful: better flavor and a much juicier texture in every bite.
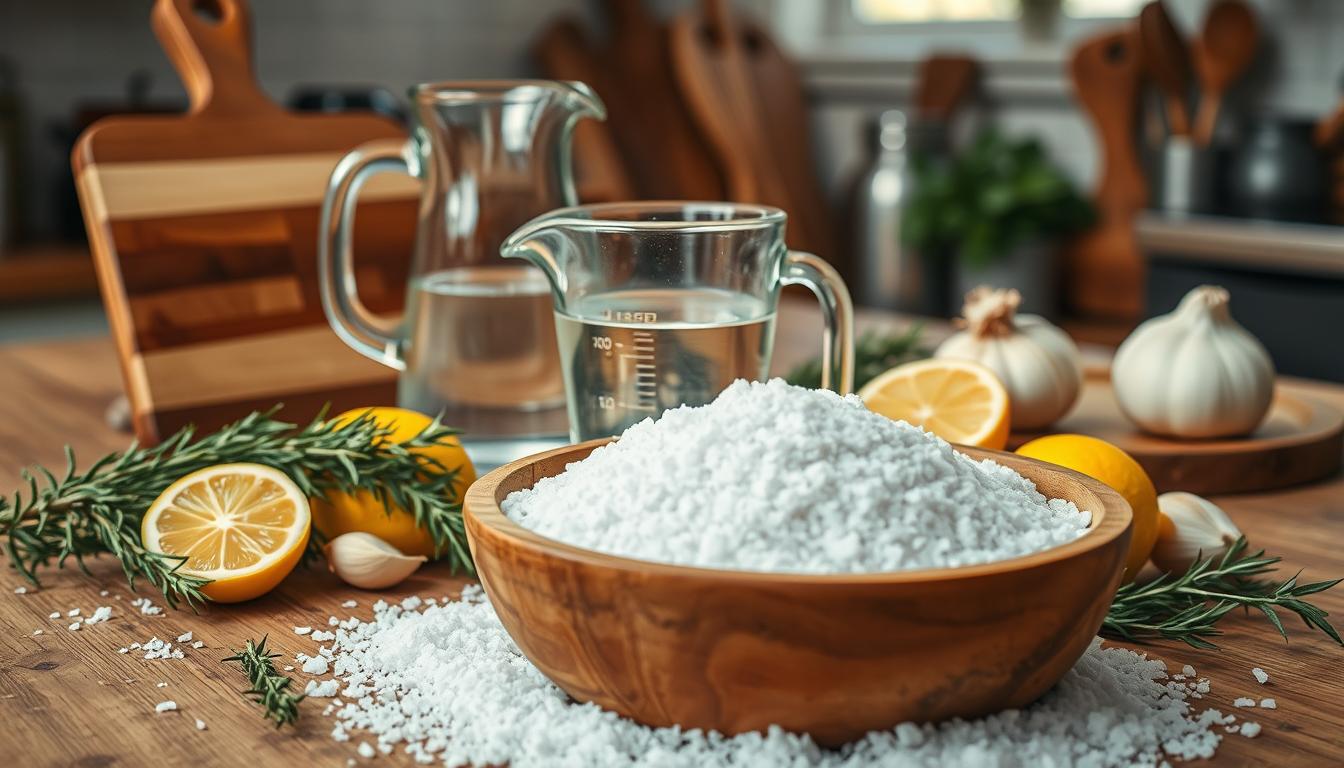
Essential Turkey Brine Ingredients You’ll Need
Making a great Turkey Brine doesn’t require complicated ingredients. In fact, you only need a few basics to get excellent results.
At its core, a Turkey Brine is built from water, salt, and a touch of sugar. That’s it. The salt helps retain moisture, while the sugar adds a subtle balance of flavor. Warm water is often used to help everything dissolve quickly and evenly.
You can also add aromatics for extra flavor. These ingredients are optional but add a lot:
- Fresh thyme sprigs
- Fresh rosemary sprigs
- Fresh sage leaves
- Black peppercorns
- Bay leaves
Many recipes suggest adding onions, carrots, garlic, and citrus fruits. But, they mainly make the brine smell good. They add little flavor to the meat, just the skin. Salt is what really improves the turkey’s taste and texture.
| Turkey Brine Ingredients | Amount (Standard Recipe) | Purpose |
|---|---|---|
| Hot tap water | 8 cups | Base liquid for the brine |
| Kosher salt | 1/2 to 3/4 cup | Preserves moisture in the meat |
| Granulated sugar | 1/2 to 3/4 cup | Balances salt flavor |
| Black peppercorns | 1 tablespoon | Adds spice and aroma |
| Fresh herbs (thyme, rosemary, sage) | 1 small bunch each | Enhances skin flavor |
| Bay leaves | 8 leaves | Optional aromatic boost |
Keep your turkey brine ingredients simple and focused. This approach saves money and delivers great results. You’ll get a moist, flavorful turkey without unnecessary ingredients.
The Perfect Salt-to-Water Ratio for Turkey Brine
Getting the salt-to-water ratio right is key to a great brine. The rule is simple: use four tablespoons of salt (1/4 cup) for every quart (4 cups) of water. This ratio ensures the salt goes deep into the turkey meat without making it too salty. You can adjust this amount based on your turkey’s size and container space.
Salt is crucial in brining. It breaks down proteins and keeps the turkey moist during roasting. If you get the ratio wrong, your turkey might taste like the ocean or be too bland.
Kosher Salt vs. Table Salt: What You Need to Know
Choosing the right salt is important for your brine. Kosher salt is best because it’s pure and has no additives. Table salt, on the other hand, might include iodine, which can affect flavor.
Kosher salt has larger crystals than table salt. This means you need to use about one-third less table salt to get the same flavor.
- Kosher salt: pure, no additives, larger crystals
- Table salt: contains iodine, smaller crystals, more concentrated
- Sea salt: works well but costs more without extra benefits
Understanding the Role of Sugar in Brining
Sugar is important in your brine, but it doesn’t make the meat sweet. Instead, it helps the skin brown better when roasting.
This browning is thanks to the Maillard reaction. It makes the turkey look like it’s from a restaurant, with a beautiful golden color.
| Ingredient | Purpose | Amount (Per Quart) |
|---|---|---|
| Kosher Salt | Moisture retention and seasoning | 4 tablespoons |
| Water | Carrier for salt and spices | 4 cups (1 quart) |
| Sugar | Skin browning via Maillard reaction | 1/4 cup (optional) |
| Spices | Flavor enhancement | Varies by recipe |
“The best turkey brine balances salt for moisture retention with sugar for visual appeal, creating a bird that’s both juicy and beautifully browned.”
Knowing these ratios lets you adjust your brine easily. You can make your turkey brine perfect for any size turkey and your taste preferences. This way, you avoid mistakes on Thanksgiving Day.
Simple Turkey Brine Recipe for Thanksgiving
Making a thanksgiving turkey brine is easy. You can use common ingredients you have at home. This recipe works for turkey breasts, whole turkeys, and even chicken. The secret is using the right amounts and fresh herbs for the best flavor.
Start with hot tap water as the base. You don’t need to boil water. Just run your tap until it’s hot. This saves time and energy and helps dissolve the salt and sugar well.

- 8 cups hot tap water (equal to 2 quarts, 4 pints, or half a gallon)
- 1/2 cup kosher salt
- 1/2 cup granulated sugar
- 1 tablespoon black peppercorns
- 1 small bunch fresh thyme sprigs
- 1 small bunch fresh rosemary sprigs
- 1 sprig fresh sage leaves
Crush your herbs and peppercorns with a rolling pin before adding them. This releases their oils and makes the flavor stronger. It’s a simple trick that makes a big difference.
| Ingredient | Amount | Purpose |
|---|---|---|
| Hot tap water | 8 cups | Base liquid for brine solution |
| Kosher salt | 1/2 cup | Preserves moisture and seasons meat |
| Granulated sugar | 1/2 cup | Balances saltiness and aids browning |
| Black peppercorns | 1 tablespoon | Adds warmth and subtle spice |
| Fresh thyme | 1 small bunch | Provides earthy, herbaceous notes |
| Fresh rosemary | 1 small bunch | Delivers piney, aromatic flavor |
| Fresh sage | 1 sprig | Contributes warm, peppery taste |
This brine recipe can be scaled up or down. It works for a small turkey breast or a whole bird. The salt-to-water ratio stays the same, making it easy to adjust.
Mix the hot water with salt and sugar until they dissolve. Then, add your bruised herbs and peppercorns. If the water is too hot, let it cool down. Now, your brine is ready for your turkey.
Step-by-Step Instructions for Brining Your Turkey
Brining a turkey involves two main steps: making the brine and soaking the turkey. These steps make your turkey juicy, flavorful, and well-seasoned. It’s easy to follow when you know each part of the brining process.
Preparing the Brine Solution
First, heat your tap water until it’s as hot as possible. Then, measure 8 cups into a big stainless steel bowl. Add kosher salt and granulated sugar to the hot water and whisk until they dissolve.
After that, crush your herb sprigs and peppercorns on a cutting board. This releases their oils and makes them fragrant. Add these crushed aromatics to your brine solution. If your water was too hot, let the mixture cool down to room temperature before proceeding. Never skip this cooling step—it’s essential for food safety.
Submerging and Storing Your Turkey Safely
Once the brine cools, carefully put your turkey in it. Make sure the turkey is fully covered in the liquid. You might need to add cold water to cover it completely. If your turkey floats, place a clean plate on top to keep it under the liquid.
For whole turkeys, use large plastic containers with lids from places like Target and Walmart. These fit well in your fridge. Never pour hot brine directly over raw turkey—it can cause bacterial growth and partially cook the outside.
Keep your turkey brining process at temperatures below 41°F. Refrigerate your turkey in the brine for the recommended time. Don’t use coolers unless you can keep the temperature safe, as bacteria grows fast between 41°F and 135°F.
- Use hot water to dissolve salt and sugar
- Cool the brine before adding turkey
- Keep turkey fully submerged
- Maintain refrigeration below 41°F
- Use food-safe plastic containers
How Long Should You Brine a Turkey
Getting the timing right for your turkey brine is crucial. It can make your turkey moist and flavorful or too salty. The secret is a simple rule followed by both pros and home cooks.
The basic rule is one hour per pound of meat. This makes planning your turkey brine easy. For example, a 12-pound turkey needs 12 hours, and an 18-pound turkey needs 18 hours. A 14-pound turkey, common for Thanksgiving, should brine for 12 to 24 hours.
Brining your turkey overnight is perfect for holidays. You can make the brine in the evening. Then, put your turkey in it before bed. Wake up to a turkey ready to roast.
Brining Times by Turkey Weight
| Turkey Weight | Recommended Brining Time |
|---|---|
| 12 pounds | 12 hours |
| 14 pounds | 12-24 hours |
| 16 pounds | 16 hours |
| 18 pounds | 18 hours |
| 20 pounds | 20 hours |
Turkey breasts need extra care. White meat can dry out easily. So, boneless turkey breast halves (2-3 pounds each) should brine for up to 4 hours. Or, you can brine them longer to keep them moist.
Don’t brine your turkey too long. Brining for more than the recommended time can make the meat too salty or mushy. Salt breaks down proteins, and too much time can change the texture. Stick to your calculated brining time for the best results.
- Plan your overnight turkey brine starting the evening before cooking
- Calculate based on one hour per pound
- Keep turkey submerged in brine the entire time
- Check your refrigerator has enough space before starting
- Set a timer to track your brining duration
This timing method makes your Thanksgiving prep easier. Your turkey brine fits well into your holiday plans. It lets you focus on other dishes while your turkey soaks up all the flavors.
Wet Brine vs. Dry Brine: Which Method is Best
When you’re ready to brine your turkey, you’ll find two main methods. Wet brining and dry brining are two ways to use salt to enhance your turkey. Wet brining involves soaking the turkey in a saltwater solution. Dry brining means rubbing salt on the turkey and letting it sit in the fridge.
It’s key to remember that brining is for keeping meat moist, not just for flavor. Many confuse brining with marinating. Marinades add taste and use acidic ingredients. Brines, however, use salt to draw moisture into the meat.
Benefits of Traditional Wet Brining
Wet brining makes your turkey absorb more liquid. This extra moisture helps keep the turkey juicy, even if it’s slightly overcooked. It’s a safety net against dryness.
Wet brining spreads salt and flavor evenly. Every bite is tender and tastes great. This method is easy to use and forgiving, making it perfect for beginners.
- Ensures consistent juiciness throughout the entire bird
- Distributes flavor evenly in all meat sections
- Forgives minor cooking mistakes
- Works reliably for home cooks of all skill levels
- Provides reliable, impressive results every time
Dry brining fans say it makes the skin crispy. But for juicy turkey, wet brining is the top choice. It’s dependable and ensures even flavor in every bite.
Common Turkey Brining Mistakes to Avoid
Learning to make a perfect turkey brine takes practice. Avoiding common mistakes can make a big difference. These mistakes can affect both flavor and food safety. Knowing these pitfalls helps you get great results every Thanksgiving.
One big mistake is pouring hot brine on a raw turkey. Hot liquid can help bacteria grow and cook the outside too much. Always let your brine cool down before adding the turkey.

Another mistake is brining a turkey that’s already been treated. Many turkeys, especially frozen ones, are pre-injected with salt. Check the label for “self-basting,” “enhanced,” or “pre-brined.” Brining these turkeys makes the meat too salty and rubbery.
Temperature mistakes are serious. Using a cooler without keeping it below 41°F is dangerous. Bacteria grow best between 41 and 135 degrees Fahrenheit.
Key Mistakes to Watch For
- Pouring hot brine over raw turkey promotes bacterial growth
- Brining pre-injected turkeys results in overly salty meat
- Using coolers without proper temperature monitoring
- Brining for too long, making meat mushy
- Failing to rinse the turkey after brining
- Not drying the turkey properly before roasting
- Using non-stainless steel containers that react with salt
- Leaving parts of the turkey unsubmerged in the brine
| Common Mistake | Why It’s a Problem | How to Fix It |
|---|---|---|
| Hot Brine Temperature | Promotes bacterial growth and uneven cooking | Cool brine to room temperature first |
| Pre-Injected Turkey | Creates overly salty, rubbery texture | Check label for “enhanced” or “self-basting” |
| Inadequate Cooling | Allows bacteria multiplication in danger zone | Keep temperature below 41°F consistently |
| Over-Brining | Makes meat mushy and excessively salty | Follow recommended brining time guidelines |
| Skipping Rinse Step | Leaves exterior too salty for crispy skin | Rinse turkey thoroughly after brining |
| Wet Turkey Before Roasting | Prevents skin from becoming crispy and golden | Pat turkey dry with paper towels completely |
Other mistakes include measuring salt wrong, which messes up the brine. Also, not fully submerging the turkey leads to uneven brining. Some use the wrong containers, causing chemical reactions with salt.
By avoiding these common mistakes, you can make a great turkey brine. Proper preparation ensures your turkey is moist and flavorful. Your family will love it at your holiday table.
Preparing Your Brined Turkey for Roasting
After brining your turkey, you’ve done a key step for flavor. The next steps are crucial for a great turkey. You need to prepare it right to get the best results.
Transforming your turkey into a golden, crispy masterpiece is the goal. You can’t just put it in the oven without preparation. The right steps will make your turkey shine.
Rinsing and Drying Techniques
First, rinse your turkey under cool water to remove excess salt. This step is important to avoid a salty taste. Make sure to clean the cavity well.
After rinsing, dry your turkey with paper towels. This is key for crispy skin. Be thorough, especially under the skin and between the meat and skin.
Achieving Crispy Golden Skin
To get crispy skin, air-dry your turkey in the fridge. Place it on a rack over a baking sheet. Let it dry for a few hours or overnight.
Before roasting, brush it with oil or melted butter. Add herbs or spices for extra flavor. The air-drying step is crucial for crispy skin.
- Remove turkey from brine and discard remaining liquid
- Rinse thoroughly under cool running water
- Pat dry completely with paper towels
- Place on a rack uncovered in the refrigerator
- Air-dry for several hours or overnight
- Brush with oil or butter before roasting
Adapting This Brine Recipe for Turkey Breast or Chicken
Your turkey brine ingredients are great for more than just whole turkeys. You can use the same recipe for turkey breasts, whole chickens, chicken pieces, and pork cuts. This makes it easy to improve any lean meat you cook all year.
The recipe works well for 2-3 pound boneless turkey breast halves. It’s perfect for smaller gatherings where you prefer white meat. Since turkey breasts are smaller and boneless, they need only 3-4 hours of brining.
When using turkey brine for other proteins, keep the salt-to-water ratio the same. You need 4 tablespoons of salt for every quart of water. This ratio works for any size of bird or piece of meat.
| Protein Type | Weight Range | Brining Time | Base Recipe Adjustment |
|---|---|---|---|
| Turkey Breast (boneless) | 2-3 pounds | 3-4 hours | Use base recipe as written |
| Whole Chicken | 4-6 pounds | 4-6 hours | Use base recipe as written |
| Chicken Pieces (breasts, thighs, drumsticks) | 1-2 pounds | 2-3 hours | Reduce liquid by half |
| Pork Tenderloin | 2-3 pounds | 4-8 hours | Use base recipe as written |
| Pork Chops | 0.5-1 pound each | 2-4 hours | Reduce liquid by half |
For a whole chicken, you can use the turkey brine without any changes. Brine for 4-6 hours based on size. For chicken pieces like breasts or thighs, brine for 2-3 hours since they absorb brine faster.
Pork also loves the turkey brine ingredients and method. Pork tenderloin or roasts need 4-12 hours, depending on thickness. Pork chops only need 2-4 hours for great flavor.
- Experiment with aromatic additions like bay leaves, garlic cloves, or citrus zest
- Try different herb combinations to complement your chosen protein
- Always maintain the proper salt-to-water ratio for consistent results
- Scale up ingredients proportionally when doubling or tripling any recipe
Learning to adapt turkey brine ingredients lets you brine with confidence for any event. Whether it’s Thanksgiving, a summer barbecue, or a weeknight dinner, you have a versatile technique for all seasons.
Conclusion
Mastering a Turkey Brine is one of the simplest ways to guarantee a juicy, flavorful turkey every time. With just a few basic ingredients and a bit of patience, you can completely transform the texture and taste of your bird. Instead of dry or bland meat, you get tender, well-seasoned turkey that stays moist from the first bite to the last.
The best part is that you don’t need advanced cooking skills or special tools. Once you understand the basics, Turkey Brine becomes a reliable technique you can use for holidays, family dinners, or any time you want better results from your roast turkey.
FAQs
1. What is a Turkey Brine?
A Turkey Brine is a saltwater solution used to soak turkey before cooking. It helps the meat absorb moisture and flavor, making it juicier and more tender.
2. How long should I brine a turkey?
Most turkeys should be brined for 8 to 16 hours. Smaller birds need less time, while larger turkeys may benefit from a full overnight brine.
3. Can I over-brine a turkey?
Yes. Leaving a turkey in brine for too long can make it overly salty and affect the texture. It’s important to follow recommended timing.
4. Do I need to rinse the turkey after brining?
Yes. After using a Turkey Brine, rinsing helps remove excess salt from the surface. Drying the turkey afterward is also important for crispy skin.
5. Can I use the same brine for other meats?
Yes, this method works well for chicken, turkey breasts, and other poultry. It helps improve moisture and flavor across different cuts.
6. Do I need to refrigerate the turkey while brining?
Absolutely. The turkey must be kept cold during brining to ensure food safety.