How to Make Perfect Betty Crocker Chocolate Chip Cookies: Classic Recipe & Tips
The Betty Crocker Chocolate Chip Cookie Recipe has been a beloved kitchen staple for generations. First introduced on a Betty Crocker radio program in 1939, this timeless recipe has been perfected over 75+ years to create the ideal balance of crispy edges and chewy centers. Whether you’re an experienced baker or trying your hand at homemade cookies for the first time, this classic recipe delivers consistent, delicious results that will have everyone reaching for seconds.
In this guide, we’ll walk through the exact ingredients, step-by-step instructions, and professional tips to ensure your cookies turn out perfectly every time. We’ll also cover variations, storage recommendations, and answers to common questions to help you master this iconic recipe.
-
Jump to Recipe
-
Print Recipe
The History Behind Betty Crocker’s Iconic Cookie Recipe
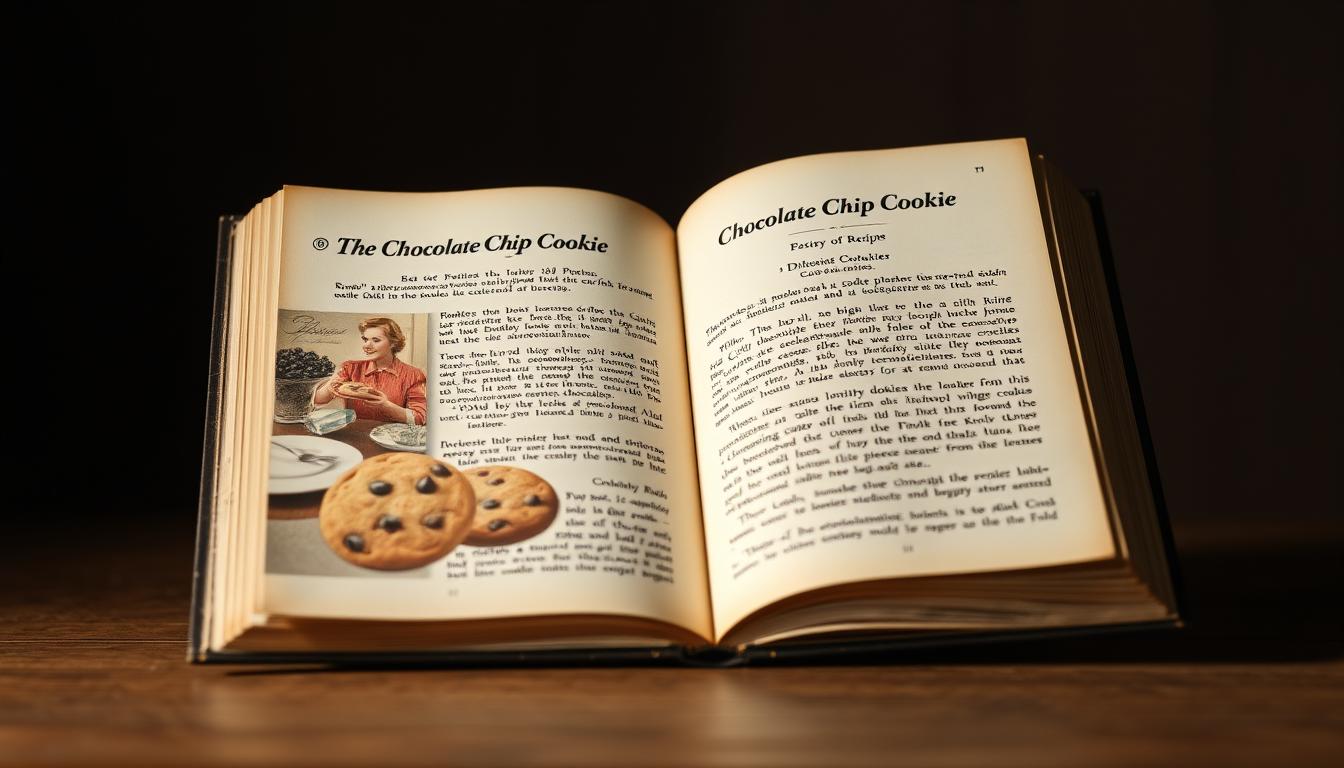
The original Betty Crocker Chocolate Chip Cookie Recipe appeared in the first 1950 printing of the Betty Crocker Picture Cookbook
This beloved recipe first appeared on a Betty Crocker radio program in 1939 and was later published in the first edition of the Betty Crocker Picture Cookbook in 1950. Over the decades, it has been carefully refined to perfection.
The original 1950s version called for shortening instead of butter, as it was less expensive and had a longer shelf life. Later iterations switched to margarine when it became the popular choice in American kitchens. Today’s version uses real butter, which Betty Crocker’s test kitchen determined provides the best flavor profile – a conclusion that countless home bakers enthusiastically support.
What makes this recipe special is its remarkable consistency and adaptability. It has been tested through changing ingredients, kitchen technologies, and baking trends, yet continues to produce reliably delicious cookies that appeal to all generations.
Recipe Ingredients

The beauty of the Betty Crocker Chocolate Chip Cookie Recipe lies in its simple, high-quality ingredients. Here’s everything you’ll need to make approximately 48 cookies:
Standard Ingredients
- 2¼ cups (281g) all-purpose flour – Provides structure and the perfect balance of tenderness and chewiness
- 1 teaspoon baking soda – Gives the cookies their lift
- ½ teaspoon salt – Enhances all the flavors
- 1 cup (226g) butter, softened – Use real butter for the best flavor
- ¾ cup (150g) granulated sugar – Provides sweetness and helps create crispy edges
- ¾ cup (165g) packed brown sugar – Adds moisture and a rich, caramel-like flavor
- 1 egg – Contributes to the cookies’ structure and texture
- 1 teaspoon vanilla extract – Enhances the overall flavor profile
- 2 cups (340g) semisweet chocolate chips – The star of the show!
- 1 cup chopped nuts (optional) – Walnuts or pecans work best
Ingredient Substitutions
- Gluten-Free Option: Replace all-purpose flour with a 1:1 gluten-free baking flour blend
- Dairy-Free Option: Substitute plant-based butter sticks (not spread) for regular butter
- Egg Alternative: Use ¼ cup unsweetened applesauce or a commercial egg replacer
- Chocolate Variations: Try dark chocolate, milk chocolate, or butterscotch chips
- Sugar Options: Coconut sugar can replace brown sugar for a different flavor profile
- Add-ins: Consider dried cranberries, shredded coconut, or toffee bits
Measuring Tip: For the most accurate results, stir your flour before spooning it into the measuring cup, then level it off with a knife. This prevents packing too much flour into your cookies, which can make them dry.
Essential Equipment

Having the right tools makes baking these cookies even easier. Here’s what you’ll need:
- Cookie Sheets: Betty Crocker’s test kitchen recommends shiny, light-colored baking sheets for the most even heat distribution and uniform baking
- Mixing Bowls: One large bowl for wet ingredients and one medium bowl for dry ingredients
- Measuring Tools: Dry measuring cups, liquid measuring cup, and measuring spoons
- Mixer: Either a stand mixer, hand mixer, or a sturdy wooden spoon will work
- Cookie Scoop: A 1¼-inch diameter scoop (about 2 tablespoons) creates uniformly sized cookies
- Cooling Rack: Essential for achieving the perfect texture as cookies cool
- Spatula: A thin spatula helps transfer cookies without breaking them
- Parchment Paper (optional): Makes cleanup easier and prevents sticking
Pro Tip: Having at least two cookie sheets allows you to prepare the next batch while one is in the oven, streamlining your baking process.
Step-by-Step Instructions

-
Preheat and Prepare
Position your oven rack in the center position and preheat to 375°F (190°C). This center position ensures the most even heat circulation. If using parchment paper, line your cookie sheets now.
-
Mix Wet Ingredients
In a large bowl, beat the softened butter, granulated sugar, and brown sugar with an electric mixer on medium speed until light and fluffy, about 1 minute. Scrape down the sides of the bowl occasionally to ensure even mixing. The mixture should be creamy but not overly soft.
-
Add Egg and Vanilla
Add the egg and vanilla extract to your butter-sugar mixture. Beat until completely blended and smooth, about 30 seconds. The mixture should look slightly lighter in color and well incorporated.
-
Combine Dry Ingredients
In a separate bowl, whisk together the flour, baking soda, and salt until well combined. This ensures these ingredients are evenly distributed throughout your cookies.
-
Create the Dough
Gradually add the dry ingredient mixture to the wet ingredients, stirring just until blended. The dough will be somewhat stiff. Avoid overmixing, which can develop too much gluten and result in tough cookies.
-
Add Mix-ins
Gently fold in the chocolate chips and nuts (if using) until evenly distributed throughout the dough. This gentle folding prevents overmixing while ensuring every bite has chocolate.
-
Portion the Cookies
Drop rounded tablespoonfuls of dough about 2 inches apart onto ungreased cookie sheets. For the most consistent results, use a cookie scoop to create uniform cookies that will bake evenly.
-
Bake to Perfection
Bake one sheet at a time for 8-10 minutes or until the edges are light golden brown while centers remain soft. The cookies may look slightly underdone in the center, but they’ll continue cooking from residual heat after removal.
-
Cool Properly
Let cookies rest on the baking sheet for 2 minutes before transferring to a cooling rack. This brief resting period allows them to set up enough to move without breaking. Cool completely, about 30 minutes, before storing.
Ready to Start Baking?
Print this recipe to keep in your kitchen or save it for later!
Pro Tips for Perfect Cookies

For Chewy Cookies
- Use more brown sugar than white sugar
- Slightly underbake by 1-2 minutes
- Use room temperature eggs
- Add an extra egg yolk
- Store with a slice of bread to maintain moisture
For Crispy Cookies
- Use more white sugar than brown sugar
- Bake 1-2 minutes longer
- Use melted butter instead of softened
- Flatten dough slightly before baking
- Store in a container with a loose lid
Preventing Cookie Spread
- Chill the dough: If your cookies are spreading too much, refrigerate the dough for 30 minutes before baking
- Check your butter temperature: Butter should be softened but still cool to the touch, not melted or overly soft
- Use the right flour amount: Too little flour can cause excessive spreading
- Bake on cool cookie sheets: Allow baking sheets to cool completely between batches
- Check your oven temperature: An oven thermometer can verify your oven is heating correctly
High-Altitude Adjustments (3,500+ ft)
- Decrease sugar to ⅔ cup each of white and brown sugar
- Increase flour to 2½ cups
- Add 2 teaspoons of water to the dough
- Increase oven temperature by 25°F and reduce baking time by 1-2 minutes
“The secret to perfect chocolate chip cookies is patience. Don’t rush the butter-sugar creaming process, and always allow your cookies to cool properly before storing.”
Delicious Variations

One of the best things about the Betty Crocker Chocolate Chip Cookie Recipe is its versatility. Here are some delicious ways to customize your cookies:
Flour Variations
- Whole Wheat Blend: Replace ¾ cup all-purpose flour with whole wheat flour for a nutty flavor
- Bread Flour: Substitute 1 cup bread flour for 1 cup all-purpose flour for extra chewiness
- Oat Flour: Replace ½ cup all-purpose flour with oat flour for a heartier texture
Chip Variations
- Triple Chocolate: Use ⅔ cup each of dark, milk, and white chocolate chips
- Butterscotch Blend: Mix 1 cup chocolate chips with 1 cup butterscotch chips
- Mint Chocolate: Use mint chocolate chips for a refreshing twist
Add-in Ideas
- Nutty Delight: Try macadamia nuts, hazelnuts, or roasted peanuts
- Fruity Twist: Add ½ cup dried cranberries or cherries
- Sweet Crunch: Mix in ½ cup toffee bits or crushed pretzels

Get creative with your cookies – try making ice cream sandwiches or crumbling them over vanilla ice cream
Serving Suggestions
- Cookie Ice Cream Sandwiches: Place a scoop of vanilla ice cream between two cooled cookies and roll the edges in mini chocolate chips or sprinkles
- Cookie Sundae: Crumble warm cookies over ice cream and top with hot fudge sauce
- Cookie Parfait: Layer crumbled cookies with pudding and whipped cream in a glass
- Cookie Crust: Crush cookies and mix with melted butter to create a pie crust for cheesecake or ice cream pie
Storage Tips

Proper storage is key to maintaining the freshness and texture of your cookies. Here’s how to keep them at their best:
Room Temperature Storage
Store completely cooled cookies in an airtight container at room temperature for up to 4 days. For softer cookies, add a slice of bread to the container – the cookies will absorb moisture from the bread, keeping them soft and chewy.
Freezer Storage
Freezing Baked Cookies
- Ensure cookies are completely cooled
- Place in a single layer in a freezer-safe container
- Separate layers with parchment paper
- Seal tightly and freeze for up to 2 months
- Thaw at room temperature for 1-2 hours before serving
Freezing Cookie Dough
- Portion dough into balls using a cookie scoop
- Place dough balls on a parchment-lined tray
- Freeze uncovered for 1-2 hours until solid
- Transfer to a freezer bag and store for up to 3 months
- Bake frozen dough (add 1-2 minutes to baking time)
Important: Never refrigerate fully baked chocolate chip cookies as this can dry them out. Either store at room temperature or freeze them.
Frequently Asked Questions

Why did my cookies spread too much?
Excessive spreading usually happens when butter is too soft or melted, the dough is too warm, or there’s not enough flour. Try chilling your dough for 30 minutes before baking, make sure your butter is softened but still cool to the touch, and double-check your flour measurement.
Can I freeze the cookie dough?
Absolutely! You can freeze portioned cookie dough for up to 3 months. Scoop the dough into balls, freeze them on a baking sheet until solid, then transfer to a freezer bag. When ready to bake, you can place the frozen dough balls directly on a baking sheet and add 1-2 minutes to the baking time.
Why use butter instead of shortening?
While the original 1950s Betty Crocker recipe called for shortening, butter provides superior flavor. Shortening creates a softer texture and prevents spreading, but butter offers a richer taste and that classic chocolate chip cookie flavor. If you prefer the texture benefits of shortening with the flavor of butter, you can use half of each.
How do I make my cookies chewier?
For chewier cookies, use more brown sugar than white sugar, slightly underbake the cookies, and add an extra egg yolk to the dough. Also, using bread flour for part of the all-purpose flour will increase chewiness due to its higher protein content.
Why did my cookies turn out cakey?
Cakey cookies usually result from too much flour or too many eggs. Make sure you’re measuring flour correctly by spooning it into the measuring cup and leveling it off, rather than scooping directly with the measuring cup, which compacts the flour.
Can I make these cookies without a mixer?
Yes! While a mixer makes the process easier, you can cream the butter and sugars by hand using a wooden spoon. Just make sure your butter is properly softened, and be prepared for a bit of an arm workout to get the right consistency.
Share Your Betty Crocker Cookie Success

The Betty Crocker Chocolate Chip Cookie Recipe has stood the test of time for good reason. These cookies bring joy to kitchens across generations with their perfect balance of crispy edges and chewy centers. Whether you follow the classic recipe exactly or add your own creative twist, these cookies are sure to become a favorite in your home.
We’d love to see your cookie creations! Take a photo of your Betty Crocker chocolate chip cookies and share it on social media with the hashtag #BettyCrockerCookies. Your baking success might even be featured on the official Betty Crocker website or social media channels.
Ready to Bake More?
Explore more classic Betty Crocker recipes or share your cookie success!